Contents
If you’re someone who has always been fascinated by the art of building things with your own two hands, then the world of skin-on-frame kayaks might just be the perfect avenue for your creative spirit. The process of constructing these unique watercrafts is a true art form in itself, involving a delicate blend of craftsmanship, ingenuity, and a deep understanding of the materials at hand. In this article, we will take a closer look at the intriguing world of building a skin-on-frame kayak, exploring the techniques, challenges, and rewards that come with creating your very own masterpiece on the water. So grab your tools and join us on this exciting journey into the realm of kayaking craftsmanship!
Choosing the Right Materials
Selecting the Frame Materials
When it comes to building a skin-on-frame kayak, choosing the right materials is essential. The frame materials need to be lightweight, yet strong enough to withstand the stresses of paddling. One popular choice for the frame is wood, which offers a beautiful aesthetic and good structural integrity. Common types of wood used include cedar, pine, and oak.
Another option for the frame material is aluminum or PVC pipe, which provides excellent durability and ease of construction. These materials are lightweight and resistant to corrosion, making them ideal for kayak frames. Ultimately, the choice of frame material will depend on personal preference and the desired characteristics of the kayak.
Choosing the Skin Materials
The skin is an integral part of a skin-on-frame kayak, as it provides the boat’s form and keeps the structure rigid. When selecting the skin material, it’s important to consider factors such as durability, flexibility, and water resistance. One popular choice for the skin is nylon or polyester fabric coated with a waterproofing substance like polyurethane or silicone.
Canvas is another traditional option that offers excellent durability and water resistance. It is important to choose a fabric that can withstand the elements and not stretch or sag when under tension. It’s also worth considering the weight of the fabric, as lighter materials will result in a more maneuverable kayak.
Designing the Kayak Frame
Deciding on the Kayak Dimensions
Designing the kayak’s dimensions is an important step in the building process. The length, width, and depth of the kayak will influence its stability, maneuverability, and carrying capacity. Longer kayaks tend to track straighter and glide more efficiently, while shorter kayaks offer better maneuverability.
The width of the kayak affects its stability, with wider kayaks generally being more stable but sacrificing some speed. Ultimately, the dimensions should be based on your intended use of the kayak and personal preferences.
Creating the Frame Design
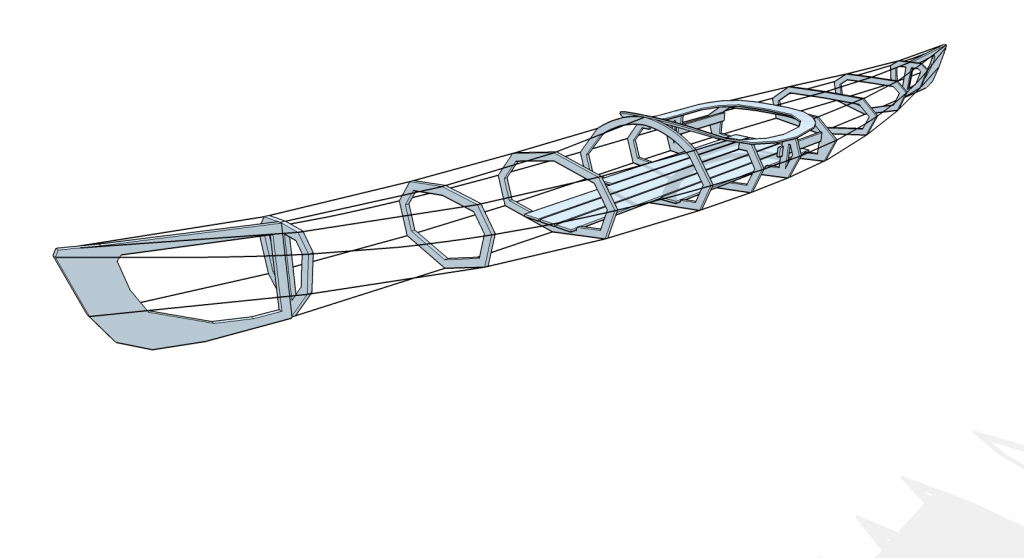
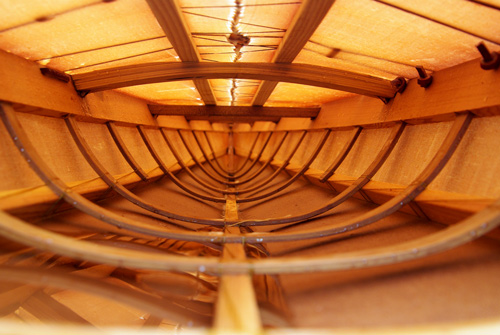
Once you have determined the dimensions of your kayak, it’s time to create a frame design. This involves sketching out the basic shape of the kayak, including the cockpit area, bow, and stern. Consider how the frame pieces will fit together and provide sufficient support for the skin.
During the design phase, it’s also important to consider any additional features you want to include, such as bulkheads for storage compartments or a seat arrangement that suits your paddling style. Take your time during this stage to ensure a well-thought-out and functional design.
Preparing the Frame Components
Measuring and Cutting the Frame Pieces
With the design finalized, it’s time to start preparing the frame components. Begin by measuring and cutting the frame pieces according to the dimensions specified in your design. Take care to make precise cuts to ensure a proper fit when assembling the frame.
Using a saw or other appropriate tools, cut the wood or pipe at the correct angles and lengths. Accuracy is crucial at this stage to ensure that the frame comes together smoothly and evenly. Double-check your measurements before cutting to avoid any mistakes.
Sanding and Shaping the Frame Components
Once the frame pieces are cut, it’s important to sand and shape them to ensure a smooth finish. Sanding will help remove any rough edges or splinters, making the frame more comfortable to handle and improving its overall appearance.
Using sandpaper or a power sander, carefully sand each frame piece. Pay attention to curved or angled sections, as these may require additional shaping to achieve the desired form. Take your time during this process, as it will greatly impact the final result of your kayak.
Joining the Frame
Assembling the Frame Pieces
Now that the frame components are ready, it’s time to assemble them. Lay out the frame pieces on a flat and level surface according to your design. This will allow you to visualize how the frame will come together and ensure that each piece fits properly.
Begin by connecting the longer, structural pieces of the frame, such as the gunwales and keel. Use a combination of screws, dowels, or other appropriate fasteners to secure the joints. Take care to align the pieces accurately to maintain the kayak’s structural integrity.
Securing the Frame Joints
Once the main sections of the frame are assembled, it’s important to reinforce the joints for added strength. This can be done by adding additional fasteners or using epoxy resin to bond the joints. Reinforcing the frame joints will help ensure that the kayak remains sturdy and can withstand the forces encountered during paddling.
Before moving on to the next step, thoroughly check the frame for any loose or weak joints. Making any necessary adjustments now will save you time and effort in the long run.
Constructing the Skin
Preparing the Skin Materials
With the frame completed, it’s time to turn your attention to the skin of the kayak. Prepare the skin material by measuring and cutting it to the appropriate size and shape. Lay the fabric out on a clean and flat surface, ensuring that it is free from wrinkles or folds.
If using nylon or polyester fabric, consider applying a waterproofing substance to enhance its resistance to water. This could involve spraying or brushing on a layer of polyurethane or silicone.
Cutting and Shaping the Skin Pieces
Once the skin material is ready, carefully cut and shape it to fit the kayak frame. This involves cutting out panels of fabric that will cover the sides, bow, stern, and cockpit of the kayak. Make precise cuts to ensure a snug and secure fit around the frame.
Depending on your design, you may also need to create additional pieces of the skin to cover any bulkheads or storage compartments. Take your time during this stage to ensure accuracy and a clean finish.
Attaching the Skin to the Frame
Lacing the Skin to the Frame
Attaching the skin to the frame is a critical step in the construction process. One popular method is lacing, where the skin is threaded through holes in the frame and then pulled tight. Begin by starting at one end and work your way around the kayak, pulling the skin snugly and evenly.
As you lace the skin, take care to maintain an equal tension across the entire surface. This will ensure a smooth and uniform appearance. It’s also important to check for any wrinkles or slack areas and adjust accordingly.
Tightening the Skin
Once the skin is laced onto the frame, it’s time to tighten it. This can be done by applying hydraulic or mechanical pressure to stretch the skin and eliminate any excess slack. Start at the center of the kayak and gradually work your way towards the bow and stern, applying pressure evenly.
Taking your time during this step is crucial, as it will greatly affect the kayak’s performance on the water. Ensure that the skin is taut and free from any wrinkles or sagging.
Reinforcing the Kayak
Installing Deck Beams and Gunwales
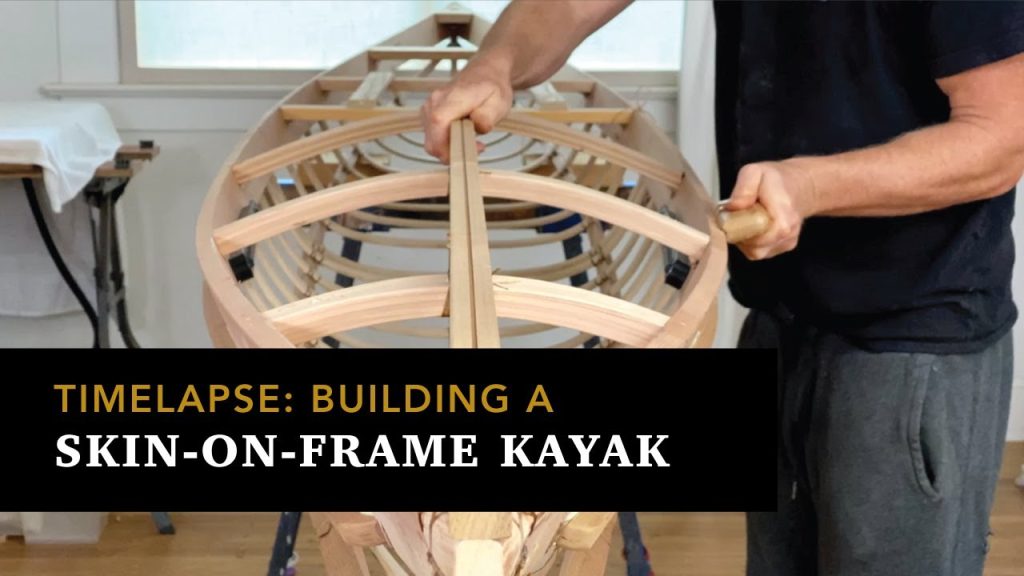
To reinforce the kayak’s structure, it’s important to install deck beams and gunwales. Deck beams provide additional support to the skin, while gunwales help secure the skin to the frame. Begin by measuring and cutting the required pieces, ensuring that they fit snugly against the frame.
Secure the deck beams and gunwales in place using appropriate fasteners. Pay careful attention to alignment and make any necessary adjustments to ensure a proper fit. These reinforcements will add strength and stability to the kayak, making it better suited for a variety of conditions.
Adding Bulkheads and Seats
To further enhance the functionality and comfort of the kayak, consider adding bulkheads and seats. Bulkheads create internal divisions within the kayak, providing separate storage compartments or compartments that aid floatation. Install the bulkheads according to your design, making sure they are securely fastened.
Seats can also be added to improve comfort during long paddling trips. Determine the desired positioning and adjust the seat height to your preference. Install the seat securely, ensuring that it is stable and won’t shift during use.
Finishing Touches
Sealing and Waterproofing the Skin
To protect the skin and enhance its longevity, apply a layer of sealant or waterproofing substance. This will help prevent water absorption and potential damage to the skin. Choose a sealant that is compatible with the fabric you used for the skin.
Apply the sealant according to the manufacturer’s instructions, making sure to cover the entire surface of the skin. Allow the sealant to dry completely before proceeding to the next step.
Trimming and Sanding the Excess Skin
Once the sealant is dry, trim any excess skin material around the edges of the kayak. Use sharp scissors or a utility knife to achieve clean and even cuts. Take care not to cut into the frame or damage the skin in the process.
After trimming, carefully sand the edges of the skin to smooth any rough or uneven areas. This will create a neat and professional appearance.
Installing the Kayak Hardware
Attaching Paddling Accessories
With the basic construction complete, it’s time to install any additional paddling accessories you desire. This could include attaching paddle holders, spray skirts, or rod holders. Follow the manufacturer’s instructions for each accessory to ensure proper installation.
Consider the placement and accessibility of each accessory, taking into account your personal preferences and paddling style. Securely fasten each accessory to the kayak, double-checking that everything is firmly in place.
Mounting Deck Lines and Bungee Cords
Deck lines and bungee cords are practical additions that can enhance the functionality of your kayak. Deck lines provide a means of securing items to the deck, while bungee cords can be used to secure gear or equipment.
Measure and mark the desired positions for the deck lines and bungee cords. Drill appropriate holes in the kayak’s deck and thread the lines or cords through, securing them in place as instructed. Make sure that the lines and cords are taut and properly tensioned.
Kayak Launch and Test
Inspecting the Kayak
Before taking your newly constructed kayak out on the water, it’s important to thoroughly inspect it for any potential issues. Check all the joints and connections to ensure they are securely fastened and free from any weaknesses. Inspect the skin for any signs of damage or wear that may have occurred during the construction process.
Ensure that all hardware and accessories are properly installed and functioning as intended. Take the time to address any concerns or make necessary adjustments before heading out onto the water.
Trying Out the Kayak in Water
With the inspection complete, it’s time for the moment you’ve been waiting for: trying out your handmade kayak in the water. Find a suitable location, such as a calm lake or river, and carefully launch your kayak. Take your time to get comfortable with the feel and handling of the kayak.
Pay attention to its stability, maneuverability, and overall performance. Enjoy the experience of paddling in a kayak that you built with your own two hands. Make any necessary adjustments or refinements based on your test run, and get ready to explore new waters with your custom skin-on-frame kayak.
In conclusion, building a skin-on-frame kayak is a rewarding and enjoyable endeavor. From selecting the frame and skin materials to constructing and reinforcing the kayak, each step contributes to the creation of a unique and functional watercraft. With proper care and maintenance, your handmade kayak will provide you with countless hours of joy and adventure on the water. So, grab your tools and dive into the art of building your very own skin-on-frame kayak!

