Contents
- Understanding The Red Light Indicator On Homedics Air Purifier
- Common Causes For The Red Light On Homedics Air Purifier
- Solutions For Troubleshooting The Red Light Indicator
- Cleaning And Maintaining Homedics Air Purifier For Optimal Performance
- Cleaning The Filters
- Cleaning The External Parts Of The Air Purifier
- Additional Maintenance Tips And Tricks
- Extending The Lifespan Of Homedics Air Purifier: Tips And Tricks
- Proper Usage And Care Techniques
- Troubleshooting And Preventive Measures
- Regular Maintenance Schedule
- Frequently Asked Questions For Red Light On Homedics Air Purifier
- Conclusion
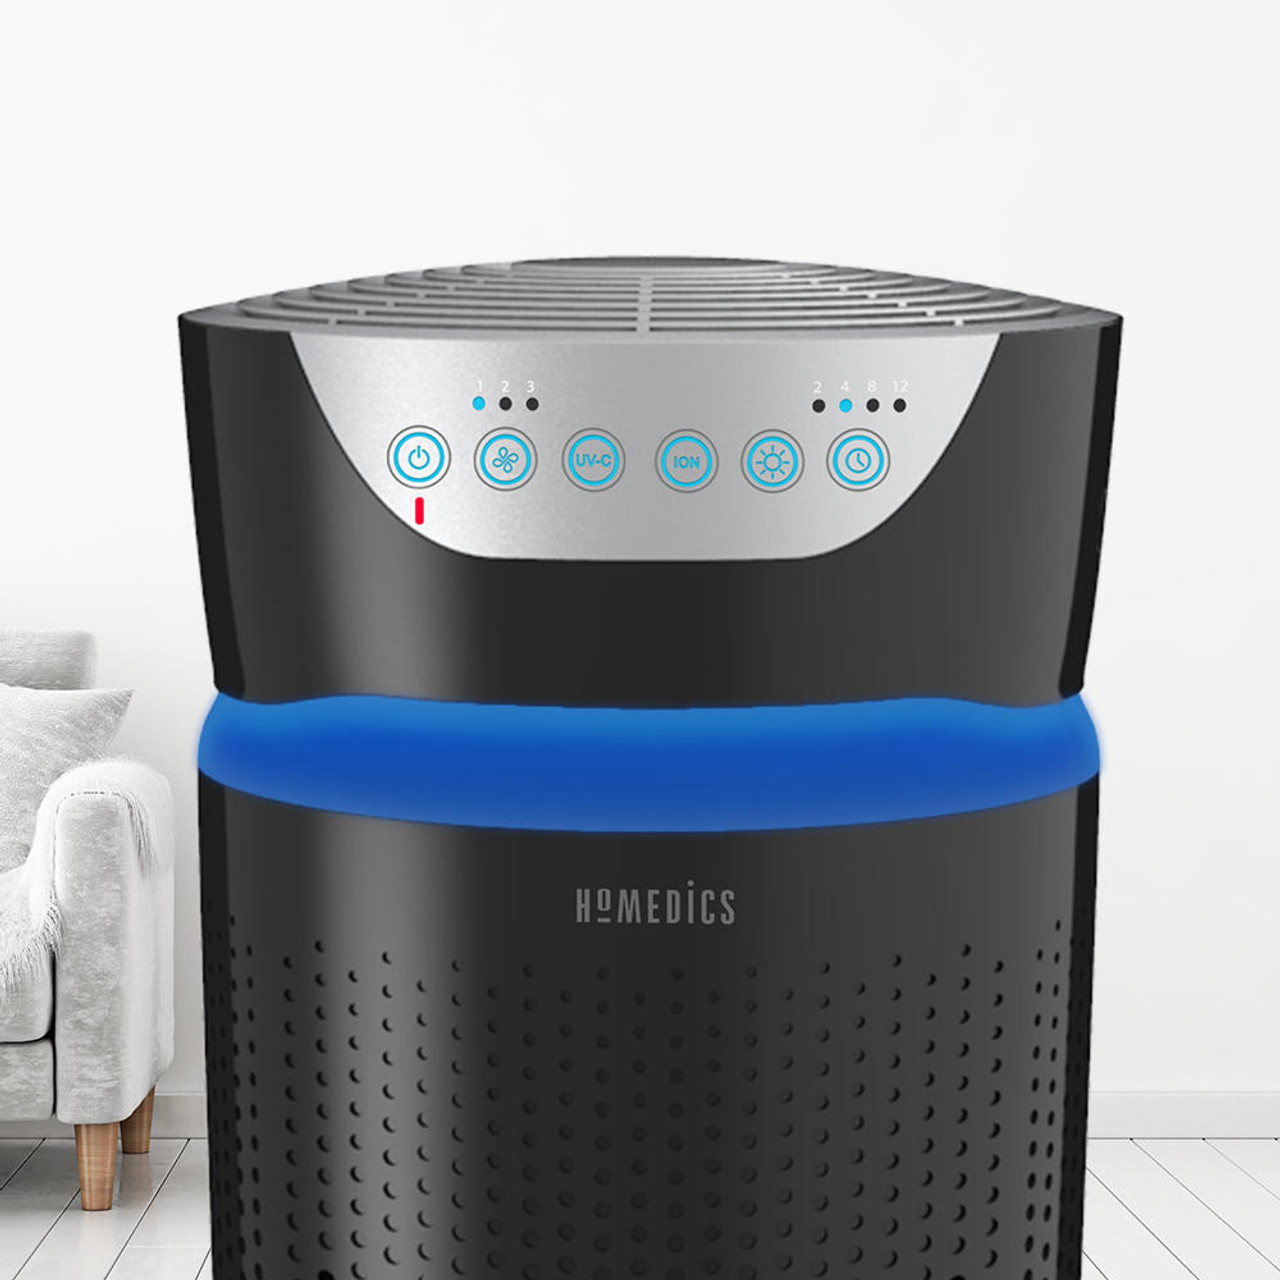
The red light on a Homedics Air Purifier indicates that the device is not functioning properly. Homedics Air Purifiers have become popular choices for improving indoor air quality.
These devices use advanced filtration systems to remove impurities such as dust, pollen, and pet dander from the air, making them ideal for individuals with allergies or respiratory conditions. However, it is not uncommon for users to encounter issues with their Homedics Air Purifiers, such as a red light appearing on the device.
This red light serves as a warning sign that something is wrong with the purifier and it requires attention. We will explore the possible reasons behind the red light on a Homedics Air Purifier and provide potential solutions to get the device back up and running efficiently.
Understanding The Red Light Indicator On Homedics Air Purifier
Understanding the red light indicator on the Homedics Air Purifier helps users identify and address potential issues for optimal air purification performance. The red light indicates a problem that requires attention, such as a clogged filter or low air quality, ensuring a healthier living environment.
The red light indicator on your Homedics air purifier is an essential feature that helps you monitor the performance and maintenance needs of your device. By understanding what the red light signifies, you can troubleshoot any issues promptly and ensure that your air purifier functions optimally.
In this section, we’ll discuss the importance of the red light indicator and how it can assist you in troubleshooting.
Importance Of The Red Light Indicator:
- Indicates filter replacement: The red light on your Homedics air purifier is an indicator that it’s time to replace the filter. This is crucial for maintaining the efficacy of your device and ensuring that it continues to deliver clean and fresh air. Regularly replacing the filter is necessary to prevent the buildup of pollutants and allergens in the air.
- Ensures optimal performance: The red light serves as a reminder to perform routine maintenance tasks to keep your air purifier functioning at its best. By promptly addressing the needs indicated by the light, you can extend the lifespan of your device and maintain its peak performance.
- Promotes cleaner air: When the red light comes on, it signifies that the filter has reached its limit and is no longer able to effectively capture contaminants from the air. By heeding this indicator and replacing the filter, you ensure that your air purifier operates efficiently, resulting in cleaner and healthier air for you and your family.
How The Indicator Can Help With Troubleshooting:
- Identifies incorrect filter installation: If the red light persists after replacing the filter, it could indicate that the filter has not been installed correctly. Check the manufacturer’s instructions and ensure that the filter is securely in place. The red light should turn off once the filter is properly installed.
- Detects power supply issues: In some cases, a continuously illuminated red light may indicate a problem with the power supply. Check the power cord, plug, and outlet to ensure they are functioning correctly. If the issue persists, consult the user manual or contact customer support for further assistance.
- Highlights internal malfunctions: In rare instances, a red light that remains on despite proper filter installation and power supply indicates an internal malfunction. If this occurs, it is advisable to reach out to Homedics customer support for troubleshooting guidance or repair options.
Now that you have a better understanding of the red light indicator on your Homedics air purifier, you can utilize this feature to ensure optimal performance and troubleshoot any potential issues efficiently. Regularly monitoring the indicator and acting upon its signals will help you maintain a cleaner and healthier indoor environment.
Common Causes For The Red Light On Homedics Air Purifier
The red light on the Homedics Air Purifier may be caused by common issues such as a dirty filter, an obstructed airflow, or a need for a filter replacement. These factors can affect the purifier’s performance and indicate the need for maintenance or troubleshooting.
Is the red light on your Homedics Air Purifier causing you some concern? Don’t worry, we’ve got you covered. In this section, we’ll explore the common causes for the red light on your air purifier, providing you with valuable insights to help troubleshoot the issue.
Let’s delve right in:
Dirty Filters As A Potential Cause:
Keeping your filters clean is essential for the optimal performance of your Homedics Air Purifier. Here are a few reasons why dirty filters might trigger the red light:
- Filters becoming clogged with dust, pet dander, or other airborne particles: When this happens, the air purifier’s sensors may detect reduced airflow, prompting the red light to illuminate.
- Neglected filter maintenance: If you have not cleaned or replaced your filters as per the manufacturer’s recommendations, the red light may be a reminder to do so.
Issues With The Power Source:
Sometimes, the red light on your Homedics Air Purifier may indicate a problem with the power supply. Consider the following possibilities:
- Power outlet connectivity problems: Ensure that the air purifier is adequately plugged into a functioning power outlet.
- Power fluctuations: In regions with unstable power supply, voltage fluctuations can trigger the red light. Using a stabilizer or connecting the purifier to an uninterruptible power supply (UPS) may help mitigate this issue.
Sensor Malfunctions And Sensor Error Codes:
Your Homedics Air Purifier is equipped with sensors to detect various air quality conditions. However, these sensors can sometimes malfunction, leading to a red light and/or error codes. Here’s what you need to know:
- Sensor calibration issues: Inaccurate readings from the air quality sensors can cause the red light to appear. In some cases, recalibrating the sensor can resolve the problem.
- Sensor error codes: Your air purifier might display specific error codes to indicate sensor-related problems. Refer to the user manual or contact Homedics customer support for guidance on troubleshooting these codes.
Remember, identifying the cause of the red light on your Homedics Air Purifier is the first step towards resolving the issue. By understanding the potential reasons behind it, you can take appropriate action to ensure your air purifier functions at its best.
Solutions For Troubleshooting The Red Light Indicator
Discover effective solutions for troubleshooting the red light indicator on your Homedics Air Purifier. Solve the issue with these tips and enjoy cleaner and purer air in your home.
The red light indicator on your Homedics air purifier can be an indication of various issues that may hinder its proper functioning. Understanding these issues and knowing how to troubleshoot them can help you maintain the performance of your air purifier.
Here are some solutions to help you troubleshoot and resolve red light indicator problems:
Cleaning Or Replacing Dirty Filters:
- Remove the filter from the air purifier by following the manufacturer’s instructions.
- Gently clean the filter using a soft brush or vacuum cleaner to remove dust and debris. Avoid using water unless specified by the manufacturer.
- If the filter is worn out, damaged, or heavily soiled, it may need replacement. Refer to the user manual or contact the manufacturer for the appropriate replacement filter.
Checking And Resetting The Power Source:
- Ensure that the air purifier is properly connected to a power source. Check the power cord and plug for any visible damage.
- Confirm if the power outlet is functioning properly by plugging in another device.
- If the power source is working but the red light persists, try resetting the air purifier. Locate the reset button (usually found at the back or bottom) and press it for a few seconds. This may resolve temporary technical glitches.
Troubleshooting Sensor Malfunctions And Error Codes:
- Error codes or sensor malfunctions can trigger the red light indicator. Consult the user manual to identify and decode the specific error code displayed.
- If the error code corresponds to a specific sensor issue, try resetting or recalibrating the sensor as instructed in the manual.
- Sensor malfunctions may require professional assistance. Consider contacting the manufacturer’s customer support or a certified technician for further guidance.
Resolving the red light indicator issues on your Homedics air purifier can improve its performance and ensure clean and fresh air in your surroundings. Following these troubleshooting solutions will help you diagnose and resolve the cause of the red light, allowing you to enjoy the benefits of a well-functioning air purifier.
Remember to refer to your user manual or seek professional assistance when needed.
Cleaning And Maintaining Homedics Air Purifier For Optimal Performance
To ensure optimal performance of your Homedics Air Purifier, it’s crucial to properly clean and maintain it. If you notice a red light on the purifier, follow these simple steps to resolve any issues and keep your air quality at its best.
Importance Of Regular Cleaning And Maintenance
Regular cleaning and maintenance are vital to ensure the optimal performance of your Homedics air purifier. Neglecting proper cleaning can result in the accumulation of dust, allergens, and particles, reducing the purifier’s efficiency. By following the recommended cleaning steps, you can enhance the air quality in your home and extend the lifespan of your device.
Proper Steps To Clean Different Parts Of The Air Purifier
To keep your Homedics air purifier in top-notch condition, it’s essential to clean the different parts regularly. Here are the proper steps to clean each component:
- Preparation:
- Before starting the cleaning process, make sure to unplug the air purifier from the power source to ensure your safety.
- Cleaning the Exterior:
- Use a soft, damp cloth to wipe the outer surface of the air purifier.
- Avoid using harsh chemicals or abrasive materials that could damage the finish.
- Cleaning the Pre-Filter:
- Remove the pre-filter from the air purifier, following the manufacturer’s instructions.
- Gently vacuum the pre-filter to remove any large particles or debris.
- Rinse the pre-filter with water to remove smaller particles and dirt.
- Allow the pre-filter to air dry completely before reinstalling it.
- Cleaning the HEPA Filter:
- Refer to the user manual to locate and remove the HEPA filter.
- Carefully vacuum the filter to remove dust and other particles.
- Depending on the model, you can clean the HEPA filter by rinsing it with water or using a soft brush attachment on your vacuum cleaner.
- Allow the HEPA filter to air dry completely before reinserting it into the air purifier.
- Cleaning the Ionizer:
- If your Homedics air purifier has an ionizer, clean it according to the manufacturer’s instructions.
- The ionizer may require periodic wiping or cleaning with a soft, damp cloth.
- Replacing the Filters:
- Regularly check the condition of your air purifier’s filters.
- Replace the pre-filter and HEPA filter as recommended by the manufacturer to maintain optimal performance.
Remember, following these cleaning and maintenance steps will ensure that your Homedics air purifier consistently functions at its best, providing you with clean and fresh air in your living space.
Cleaning The Filters
Cleaning the filters on your Homedics Air Purifier is essential for maintaining its performance and extending its lifespan. Regularly removing and cleaning the filters will help to ensure that the red light indicating a filter change is not activated, allowing your air purifier to effectively remove pollutants from your indoor air.
Maintaining clean and functioning filters is crucial for the optimal performance of your Homedics air purifier. Regular cleaning not only ensures that the air in your home remains fresh and free from pollutants but also extends the lifespan of your purifier.
In this section, we will explore the types of filters used in Homedics air purifiers and provide you with a step-by-step guide on how to clean and maintain them effectively.
Types Of Filters Used In Homedics Air Purifiers:
- Pre-filter: This filter is the first line of defense against large particles such as dust, pet hair, and lint. It traps these contaminants, preventing them from entering the main filter.
- True HEPA filter: Considered the gold standard in air purification, the True HEPA filter captures 99.97% of airborne particles as small as 0.3 microns. It effectively removes allergens, mold spores, pollen, and dust mites, providing clean and fresh air for you and your family.
- Carbon filter: Equipped with activated carbon, this filter specializes in removing odors, smoke, and harmful gases from the air. It absorbs and neutralizes particles responsible for unpleasant smells, making your indoor environment more pleasant.
- UV-C light filter: Featuring ultraviolet germicidal irradiation, this filter destroys germs, viruses, and bacteria by disrupting their DNA. It provides an additional layer of protection against airborne contaminants, ensuring that the air you breathe is as clean as possible.
Step-By-Step Guide To Clean And Maintain Filters:
To keep your Homedics air purifier operating at its best, follow these simple steps to clean and maintain the filters:
- Turn off and unplug the air purifier: Before starting any maintenance tasks, ensure that the unit is disconnected from the power source to avoid any accidents.
- Remove the filters: Depending on the model, you may need to open a panel or remove a cover to access the filters. Carefully remove the pre-filter, True HEPA filter, carbon filter, and UV-C light filter, if applicable.
- Check for visible dirt and debris: Inspect each filter for any visible signs of dirt or debris accumulation. Gently shake or vacuum the filters to remove loose particles before cleaning.
- Clean the pre-filter: If your air purifier includes a washable pre-filter, rinse it under running water to remove dirt and dust. Allow it to air dry completely before reinstalling.
- Clean the True HEPA filter and carbon filter: Unfortunately, these filters are not washable and require replacement when dirty. Follow the manufacturer’s recommendations for filter replacement intervals to maintain optimum performance.
- Clean the UV-C light filter (if applicable): If your air purifier features a UV-C light filter, gently clean it with a dry cloth to remove any dust or residue buildup. Avoid touching the UV-C bulb directly.
- Reassemble and reinstall: Once all the filters are properly cleaned, dry, and/or replaced, reassemble the unit as per the manufacturer’s instructions. Ensure that each filter is positioned correctly before closing the panel or cover.
- Reset the filter indicator (if applicable): Some Homedics air purifiers have a filter replacement indicator that needs to be reset after maintenance. Refer to the user manual for instructions on how to reset the indicator.
- Regularly monitor and repeat: Keep an eye on the filters and check their condition periodically. Follow the recommended cleaning and replacement intervals to ensure your air purifier functions optimally.
- Enjoy clean air: With your filters fresh and well-maintained, you can enjoy the benefits of clean and pure air in your home. Breathe easier and relish in the improved air quality provided by your Homedics air purifier.
By following these simple cleaning and maintenance steps, you can ensure that your Homedics air purifier continues to provide you with clean and fresh air for a long time to come. Keep in mind that proper care and regular filter maintenance are key to enjoying the full benefits of your air purification system.
Cleaning The External Parts Of The Air Purifier
Cleaning the external parts of the Homedics air purifier is essential to ensure its proper functioning. If the red light is on, it may indicate a need for cleaning the filters, wiping the exterior surfaces, and removing any accumulated dust or debris.
Regular maintenance will help maintain the air purifier’s effectiveness and prolong its lifespan.
Importance Of Cleaning The Exterior Parts
Cleaning the external parts of your Homedics air purifier is crucial to maintain its efficiency and longevity. Regular cleaning not only helps to remove dust and debris but also ensures that the air purifier remains in good working condition. By keeping the exterior clean, you create a healthier environment and prevent any potential issues that might arise due to neglecting maintenance.
Here are the significant reasons why cleaning the exterior parts of your Homedics air purifier is important:
- Prevents accumulation of dust and allergens: The external parts of the air purifier are susceptible to dust and debris build-up over time. Regular cleaning prevents the accumulation of these particles, ensuring they do not affect the air quality in your space.
- Enhances the airflow: Any dust or dirt on the exterior vents can obstruct the airflow, reducing the air purifier’s efficiency. By cleaning the exterior parts, you allow for better air circulation and optimal performance.
- Maintains aesthetic appeal: A clean air purifier not only functions better but also looks more attractive. Regularly cleaning the exterior parts keeps the air purifier in top condition, enhancing the overall appearance of your space.
Proper Cleaning Techniques For Different Surfaces
Different surfaces of the Homedics air purifier require specific cleaning techniques. To ensure effective cleaning without causing any damage, follow these guidelines:
Plastic Surfaces:
- Wipe the plastic surfaces with a soft, lint-free cloth.
- Use a mild cleaning solution or a mixture of mild soap and water.
- Gently clean the surfaces using circular motions.
- Avoid using abrasive cleaners or excessive force, as they can scratch the plastic.
Control Panel:
- Turn off and unplug the air purifier before cleaning the control panel.
- Use a soft, damp cloth to wipe the control panel.
- Avoid spraying cleaning solutions directly on the panel.
- Dry the control panel thoroughly before plugging in the air purifier.
Filters:
- Refer to the manufacturer’s instructions for cleaning the filters.
- Some filters may require replacement instead of cleaning.
- If cleaning is necessary, gently vacuum or rinse the filters as directed.
- Ensure the filters are fully dry before reinstalling them in the air purifier.
Grille And Vents:
- Use a soft brush attachment on your vacuum cleaner to remove dust from the grille and vents.
- For stubborn dirt or debris, use a slightly damp cloth to wipe the surfaces gently.
- Avoid excessive moisture, as it can damage the internal components.
Exterior Housing:
- Wipe the exterior housing of the air purifier with a soft, damp cloth.
- Dry the surfaces thoroughly to prevent any moisture from entering the device.
- Avoid using abrasive cleaners or harsh chemicals that may damage the finish.
By following these proper cleaning techniques for different surfaces, you can ensure your Homedics air purifier stays clean and functions optimally, giving you fresh and purified air for a healthier living environment. Regular maintenance and cleaning will extend its lifespan and maintain its efficiency, providing you with clean air for years to come.
Additional Maintenance Tips And Tricks
Discover essential maintenance tips and tricks to address the red light issue on your Homedics Air Purifier. Keep your air quality at its best with these easy steps.
The maintenance of your Homedics Air Purifier is crucial to ensure optimal performance and efficiency. In this section, we will provide you with additional tips and tricks to keep your air purifier running smoothly. Remember, regular maintenance not only ensures that your purifier continues to deliver clean air but also extends its lifespan.
Recommendations And Best Practices For Optimal Performance:
- Keep the air purifier in a well-ventilated area: It is essential to place your Homedics Air Purifier in a location where it can intake and circulate air efficiently. Avoid placing it in a corner or near obstacles that may obstruct the airflow.
- Clean the pre-filter regularly: The pre-filter is the first line of defense against larger particles and should be cleaned frequently. Remove the pre-filter and gently vacuum or rinse it to remove any accumulated dust and debris.
- Replace filters as recommended: Homedics Air Purifiers come with different types of filters, such as HEPA or carbon filters. Follow the manufacturer’s guidelines regarding filter replacement intervals. Regularly replacing filters ensures the removal of pollutants and allergens effectively.
- Dust the exterior: While the air purifier works to purify the air inside, it is essential to keep the exterior clean as well. Use a soft, dry cloth to wipe away dust and prevent it from accumulating on the surface.
Frequency Of Maintenance And Cleaning Routines:
- Pre-filter maintenance: Clean the pre-filter every 2 to 4 weeks, depending on the level of pollutants in your environment. If you live in an area with high pollution or have pets, more frequent cleaning may be necessary.
- Filter replacement: Depending on the model and usage, filters should be replaced every 6 to 12 months. Check the product manual for specific recommendations.
- Exterior cleaning: Dust the exterior of the air purifier once a week or as needed to prevent the accumulation of dirt and debris.
- Sensor calibration: Some air purifiers come with sensors that measure air quality. Calibrate the sensors regularly according to the manufacturer’s instructions to ensure accurate readings.
Remember, maintaining and cleaning your Homedics Air Purifier is essential for the device’s optimal performance and longevity. By following these recommendations and adhering to a regular maintenance routine, you can ensure clean, fresh air in your home or office.
Extending The Lifespan Of Homedics Air Purifier: Tips And Tricks
Extend the lifespan of your Homedics Air Purifier by following these helpful tips and tricks. Learn how to troubleshoot the red light issue and keep your air purifier running efficiently.
Benefits Of Extending The Lifespan Of The Homedics Air Purifier
- Increased Durability: By following simple maintenance tips, you can enhance the lifespan of your Homedics air purifier, ensuring that it continues to function optimally for an extended period.
- Cost Savings: Keeping your air purifier in good condition will save you money by reducing the need for costly repairs or replacements.
- Maximized Efficiency: Regular maintenance helps to keep your air purifier running at its highest efficiency levels, ensuring cleaner and healthier air in your surroundings.
- Improved Air Quality: A well-maintained air purifier effectively removes airborne pollutants, allergens, and odors, resulting in better indoor air quality and a healthier living environment.
- Enhanced Performance: Taking care of your air purifier boosts its performance, allowing it to effectively capture and eliminate a wide range of contaminants from the air, including dust, pet dander, pollen, and mold spores.
How To Ensure Longevity For Homedics Air Purifiers
To prolong the lifespan of your Homedics air purifier and ensure it continues to work efficiently, follow these simple tips:
- Regular Filter Replacement: Replace the filters of your air purifier at the recommended intervals to maintain its effectiveness. Filters typically need replacement every 3 to 6 months, depending on the model and usage.
- Clean the Exterior: Wipe the external surfaces of your air purifier regularly with a soft cloth to remove dust and dirt. This prevents the accumulation of debris, which can affect the performance and longevity of the device.
- Vacuum the Pre-Filter: For air purifiers with a pre-filter, vacuuming it every 2-4 weeks helps to remove larger particles and debris, preventing clogging and ensuring the unit works at its best.
- Keep the Air Intake Clear: Ensure that the air intake vents of your air purifier are not obstructed by objects or furniture. Restricted airflow can strain the motor and reduce the efficiency of the appliance.
- Avoid Overloading the System: Do not operate the air purifier in a room larger than its recommended coverage area. Overworking the purifier can shorten its lifespan and compromise its effectiveness.
- Proper Placement: Place your air purifier in an area with good air circulation and avoid positioning it near heat sources or direct sunlight. This helps to prevent overheating and potential damage to the device.
- Regular Inspections: Conduct periodic visual checks of the air purifier for any signs of damage or wear. If you notice any issues, contact customer support or a professional technician for assistance.
By following these tips, you can extend the lifespan of your Homedics air purifier, ensuring it continues to provide you with clean and fresh air for years to come. Take care of your purifier, and it will take care of your indoor air quality.
Proper Usage And Care Techniques
Learn how to properly use and care for your Homedics air purifier with the red light indicator. Discover techniques to maximize the efficiency and longevity of your device.
Recommended Usage Guidelines For The Air Purifier
- Place the Homedics air purifier in a well-ventilated area, away from obstructions and at least six feet away from walls or furniture.
- Position the air purifier to ensure unobstructed airflow. This allows the unit to effectively purify the surrounding air.
- Use the air purifier in a room where you spend the most time, such as your bedroom or living area, for maximum benefit.
- Keep the air purifier turned on continuously to maintain clean and fresh air in the room.
- Adjust the fan speed according to your needs. The higher the fan speed, the faster the air purifier filters the air, but it may produce more noise.
- Replace the filters regularly as advised in the user manual. This ensures optimal air purification performance.
Tips To Avoid Common Mistakes That May Decrease Its Lifespan
- Avoid using the air purifier in highly humid or damp areas, as excessive moisture can damage the unit. Keep it away from bathrooms or areas prone to water leaks.
- Do not operate the air purifier with wet hands to prevent electrical hazards.
- Clean the exterior of the air purifier regularly using a soft, dry cloth to remove dust or dirt buildup. Avoid using harsh chemicals or abrasive materials that may scratch the surface.
- Clean or replace the filters as recommended to maintain the unit’s efficiency. Clogged filters can reduce its effectiveness and strain the motor.
- Ensure proper ventilation around the air purifier. Avoid placing objects directly in front of or on top of the unit, as this may restrict airflow and impact its performance.
- If you notice any unusual smells or noises coming from the air purifier, contact Homedics customer support for assistance, as this may indicate a problem with the unit.
Remember, following these usage guidelines and care techniques will help ensure the optimal performance and longevity of your Homedics air purifier. Breathe in cleaner air and enjoy a healthier living environment!
Troubleshooting And Preventive Measures
If you find a red light on your Homedics air purifier, troubleshoot the issue by checking the filter, ensuring proper placement, and examining the power source. Taking preventive measures like regularly cleaning the unit and replacing filters can help maintain optimal performance.
Identifying Potential Issues And Addressing Them Promptly
- Red light flashing: If you notice a red light flashing on your Homedics Air Purifier, it indicates a potential issue that needs attention. Here are some common problems and their solutions:
- Filter replacement needed: A flashing red light may indicate that it’s time to replace the filters in your air purifier. Check the user manual for instructions on how to replace the filters correctly.
- Airflow blockage: Another reason for the red light could be an airflow obstruction. Make sure there are no obstructions around the air inlet or outlet of the purifier. Clear any debris or objects that might be blocking the airflow.
- Power supply issue: In some cases, a flashing red light could mean there’s a problem with the power supply. Check if the power cord is securely plugged into an outlet and the purifier.
- Sensor malfunction: If none of the above solutions work, it’s possible that there’s a malfunction with the sensor. Consider contacting Homedics customer support for further assistance.
Preventive Measures To Avoid Common Problems
- Regular filter maintenance: Preventing potential issues starts with maintaining your air purifier’s filters regularly. Follow these preventive measures to avoid problems:
- Clean or replace filters regularly: Check the user manual for the recommended frequency of filter cleaning or replacement. Regular maintenance will ensure that the purifier operates at its best efficiency.
- Vacuum pre-filter: If your air purifier comes with a pre-filter, vacuum it regularly to remove accumulated dust and debris. This will help prolong the lifespan of the primary filters.
- Monitor filter status indicator: Some models have a filter replacement indicator. Keep an eye on it and replace the filters as soon as indicated.
- Proper placement: Where you place your air purifier can influence its effectiveness. Consider these preventive measures:
- Position in an open area: Place the air purifier in an open area with good airflow to ensure proper circulation and efficiency.
- Keep away from obstructions: Avoid placing the purifier near curtains, furniture, or any obstructions that may hinder proper airflow.
- Maintain distance from walls: It’s recommended to keep a few inches of space between the purifier and walls to allow unrestricted air intake and outlet.
- Regular cleaning: Regular cleaning of your air purifier is vital for its optimum performance. Follow these preventive measures:
- Dust external surfaces: Use a soft cloth or brush to remove dust from the external surfaces of the purifier.
- Clean air vents: Regularly clean the air vents with a soft brush or vacuum attachment to prevent dust buildup.
- Wipe control panel: Keep the control panel clean by wiping it gently with a damp cloth. Avoid using harsh chemicals that may damage the panel.
Remember, by identifying potential issues early and implementing preventive measures, you can ensure that your Homedics Air Purifier operates efficiently and provides clean and fresh air in your home.
Regular Maintenance Schedule
Regular maintenance is crucial for keeping your Homedics Air Purifier running smoothly. If you notice a red light, it’s a signal to check and clean the filters to ensure optimal performance and air quality in your home. Trust in a regular maintenance schedule to keep your air purifier functioning at its best.
Creating A Maintenance Schedule For The Homedics Air Purifier
Regular maintenance is essential in keeping your Homedics air purifier running efficiently and ensuring optimal performance. By establishing a maintenance schedule, you can stay on top of necessary tasks and extend the lifespan of your device. Here are some important tasks to include in your schedule:
- Cleaning the Pre-Filter: Begin by removing the pre-filter and gently vacuuming or brushing off accumulated debris. This should be done every two weeks to maintain proper airflow.
- Replacing the Filters: The main HEPA filter and carbon filter need to be replaced periodically to ensure the air purifier continues to remove pollutants effectively. Check the manufacturer’s guidelines for filter lifespan, but as a general rule, replace them every 6-12 months.
- Wiping the Exterior: It’s important to keep the exterior surfaces of your air purifier clean. Use a soft, damp cloth to wipe away dust and dirt from the unit. Remember to unplug the device before cleaning.
- Checking for Leaks or Damage: Regularly inspect your air purifier for any signs of leaks or physical damage. Pay attention to the filter housing, motor, and power cord. If you notice any issues, contact the manufacturer for assistance.
- Vacuuming the Surrounding Area: Dust and particles can accumulate around the air purifier, hindering its effectiveness. Regularly vacuum the surrounding area to help reduce the amount of debris that could enter the purifier.
- Keeping the Area Well Ventilated: Good airflow is crucial for your air purifier to function optimally. Make sure to keep the area around the device well ventilated, avoiding placing it in closed-off corners or against walls.
- Monitoring Filter Replacement Indicators: Many Homedics air purifiers are equipped with filter replacement indicators. Check these indicators regularly and replace filters when prompted to ensure your air purifier continues to deliver clean air.
- Inspecting the Power Cord: Over time, the power cord may become frayed or damaged. Regularly inspect the cord for any signs of wear. If you notice any issues, contact the manufacturer for guidance.
- Reviewing the User Manual: Familiarize yourself with the user manual for your specific Homedics air purifier model. The manual contains important maintenance instructions and troubleshooting tips, ensuring you can address any issues that may arise.
By creating and following a maintenance schedule for your Homedics air purifier, you can ensure its longevity and maintain optimal performance. Regular cleaning, filter replacements, and inspections will help keep the air in your home clean and free from harmful pollutants.

Credit: airsmartly.com
Frequently Asked Questions For Red Light On Homedics Air Purifier
How Do You Reset The Red Light On A Homedics Air Purifier?
To reset the red light on a Homedics air purifier, follow these steps: 1. Unplug the air purifier from the power source. 2. Wait for at least 30 seconds. 3. Plug the air purifier back into the power source. 4. The red light should reset and turn off, indicating the purifier is ready for use.
What Does Red Light On Air Purifier Mean?
The red light on an air purifier indicates an issue or error that needs attention.
How Do I Get Rid Of The Red Light On My Air Purifier?
To get rid of the red light on your air purifier, refer to the user manual for troubleshooting instructions.
How Do I Reset My Homedics Filter Light?
To reset the Homedics filter light, press and hold the reset button for 5 seconds.
Conclusion
The Homedics Air Purifier may not be the best option for improving indoor air quality. With its red light indication, it signifies that the filter needs to be replaced more frequently compared to other air purifiers. While it may be a convenient and affordable choice initially, the ongoing cost of replacing filters can quickly add up.
It’s important to consider the long-term expenses and maintenance requirements when purchasing an air purifier. Additionally, there are numerous other air purifier options available on the market that offer better performance and value for money. Remember to do thorough research and read customer reviews before making any purchase decisions.
Ultimately, prioritizing your health and well-being should be the driving force behind selecting the right air purifier for your needs.