
Contents
- Understanding Nest Thermostat Installation
- Preparing For Nest Thermostat Installation
- Unpacking And Familiarizing With The Nest Thermostat
- Identifying And Locating Your Hvac Equipment
- Nest Thermostat Wiring Basics
- Wiring The Nest Thermostat
- Connecting To The Nest Thermostat Base
- Configuring Nest Thermostat Settings
- Troubleshooting And Tips For Successful Installation
- Finalizing Nest Thermostat Installation
- Frequently Asked Questions For Nest Wiring Guide: Navigating Nest Thermostat Installation
- Conclusion
The nest wiring guide provides clear instructions for successfully installing a nest thermostat. This comprehensive guide ensures a smooth and easy installation process.
The installation of a nest thermostat can be a daunting task without proper guidance. However, with the help of the nest wiring guide, you can navigate through the installation process with ease. This guide provides step-by-step instructions, illustrations, and helpful tips to ensure that your nest thermostat is installed correctly and efficiently.
By following the guide, you can confidently wire your thermostat, connect your system, and set up your nest for optimal comfort and energy savings. Whether you’re a seasoned diy enthusiast or a novice in home automation, the nest wiring guide is a valuable resource to simplify the installation process and get your nest thermostat up and running in no time.
Credit: www.dell.com
Understanding Nest Thermostat Installation
Installing a nest thermostat can be a breeze if you understand the nuances of the process. One major benefit of installing a nest thermostat is the increased energy efficiency it provides. With advanced features like learning algorithms and remote access, a nest thermostat can optimize your hvac system’s performance.
Before installation, it is crucial to ensure compatibility with your existing heating and cooling system. By checking the compatibility of the nest thermostat with your hvac unit, you can avoid any potential issues down the line. Taking these key considerations into account will help you navigate the nest wiring guide with confidence and ease.
Preparing For Nest Thermostat Installation
Preparing for nest thermostat installation involves a few essential steps to ensure a smooth process. First, assess the compatibility of your current hvac system with the nest thermostat. Next, gather the necessary tools and equipment needed for installation. These may include a screwdriver, level, voltage tester, and wire labels.
Before starting the installation, it’s crucial to shut off the power to your hvac system to avoid any electrical hazards. By following these simple guidelines, you can confidently navigate the installation of your nest thermostat and enjoy its energy-saving benefits.
Unpacking And Familiarizing With The Nest Thermostat
Unpacking the nest thermostat reveals its components, allowing you to familiarize yourself with this innovative device. As you begin, take note of the nest thermostat’s user interface, designed for easy navigation. With the help of the nest app, setting up the thermostat becomes a hassle-free process.
Whether you’re a first-time user or upgrading your existing system, understanding the nest thermostat’s installation guide ensures a smooth transition. By following this nest wiring guide, you can confidently navigate through the installation process and enjoy the benefits of a smarter, more efficient home.
So, let’s dive in and explore the world of nest thermostats.
Identifying And Locating Your Hvac Equipment
Identifying and locating your hvac equipment is an important step in the nest thermostat installation process. To start, you need to understand the different types of hvac systems that may be in your home. This will help you determine where to locate your furnace and air conditioning units.
Once you have located them, it is time to identify the wires and terminal connections. This step is crucial for proper installation and functionality of your nest thermostat. Taking the time to correctly identify these components will ensure a smooth installation process and optimal performance of your hvac system.
Whether you have a forced air system, a heat pump system, or a boiler system, knowing how to locate and identify your equipment is key to successfully navigating the nest wiring guide.
Nest Thermostat Wiring Basics
Nest thermostat wiring basics: understanding your existing wiring is crucial when installing a nest thermostat. One essential aspect is identifying the common wire (c-wire) for your nest thermostat system. This wire provides constant power, enabling the nest thermostat to function effectively.
However, if you don’t have a c-wire, don’t worry! There are hidden alternatives available to tap into for the necessary power supply. Learning how to navigate these alternative options will ensure a successful installation and optimal performance of your nest thermostat.
Rest assured, our comprehensive guide will walk you through the wiring process step by step, making it easy to install your nest thermostat seamlessly. With our expert advice, you’ll soon have a perfectly functioning nest thermostat, bringing comfort and energy efficiency to your home.
Wiring The Nest Thermostat
Wiring the nest thermostat can seem overwhelming, but with this step-by-step guide, the process becomes much easier. First, make sure to connect the wires to the correct terminals. This ensures that your thermostat functions properly. If you encounter any issues, troubleshooting common wiring problems can help resolve them.
By following these simple instructions, you can successfully navigate the nest thermostat installation process without any confusion or frustration. With the right guidance, you’ll have your thermostat up and running in no time. So, take a deep breath and let’s get started on wiring your nest thermostat.
Connecting To The Nest Thermostat Base
Connecting the nest thermostat base is an essential step in the nest wiring guide. First, mounting the base to the wall is crucial for stability and proper functionality. By attaching and securing the nest thermostat, you ensure it stays in place securely.
Afterward, you need to test the nest thermostat connection to ensure it is working correctly. Following this guide will assist you in navigating the installation process smoothly.
Configuring Nest Thermostat Settings
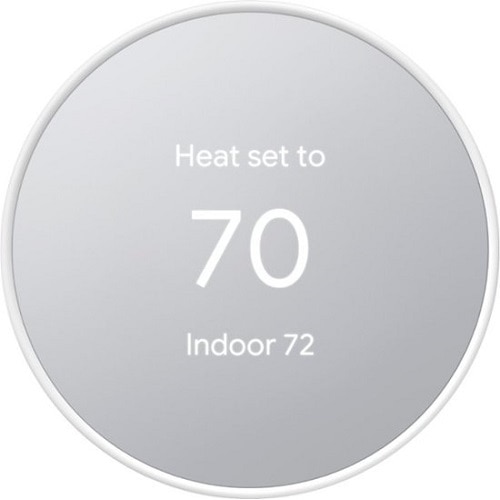
Navigating the nest thermostat menu is a crucial part of configuring its settings. Accessing the menu allows you to customize the temperature and schedule preferences according to your needs. With the nest thermostat, you can also integrate other smart home devices, giving you full control over your home’s climate.
Adjusting the temperature and scheduling preferences is made easy through the intuitive interface of the nest thermostat menu. By navigating through the options, you can set the desired temperature for different times of the day, ensuring optimal comfort and energy efficiency.
Additionally, the nest thermostat can be paired with other smart home devices, such as smart lights or smart locks, allowing you to create a fully connected and convenient ecosystem. With the nest wiring guide, configuring the nest thermostat settings becomes a seamless process, enhancing your home’s comfort and efficiency.
Troubleshooting And Tips For Successful Installation
Navigating the installation of a nest thermostat can be a daunting task, but with the right troubleshooting tips and solutions, you can ensure a successful setup. Common issues may arise during the installation process, causing frustration and confusion. However, professional help and support are available for troubleshooting.
By following these guidelines and seeking assistance when needed, you can overcome any obstacles that may come your way. Installing a nest thermostat is a worthwhile investment that can revolutionize your home’s energy efficiency. So don’t be discouraged by potential challenges – tackle them head-on and enjoy the benefits of a smart and efficient heating and cooling system.
With the right guidance, you can confidently navigate the complex world of nest thermostat installation.
Finalizing Nest Thermostat Installation
Navigating the installation of a nest thermostat may seem daunting, but with the right guidance, it becomes a seamless process. Once the installation is complete, the next step is to ensure the thermostat’s functionality. Test it by adjusting the temperature and observing if the changes are reflected accurately.
For precise readings, calibrate the temperature sensors to ensure accuracy. This will allow you to enjoy the full benefits of a smart and connected home. With the nest thermostat in place, you can conveniently control and monitor your home’s temperature, making it more energy-efficient and comfortable.
Embrace the era of smart technology and experience the convenience it brings to your daily life.
How Do I Install A Nest Thermostat?
To install a nest thermostat, you will need to turn off the power, remove the old thermostat, connect the nest base to the wires, attach the nest display, and then set up your thermostat using the nest app.
Can I Install A Nest Thermostat Myself?
Yes, you can install a nest thermostat yourself. The installation process is straightforward and the nest app provides step-by-step instructions to guide you through the process. However, if you’re not comfortable working with electrical wiring, it’s recommended to hire a professional.
Is It Difficult To Wire A Nest Thermostat?
Wiring a nest thermostat is not difficult if you follow the instructions carefully. The nest app provides a wiring guide that shows you how to connect the wires to the nest base. If you’re unsure about any step, it’s best to consult a professional for assistance.
How Do I Know Which Wires Go Where On My Nest Thermostat?
To determine which wires go where on your nest thermostat, you can refer to the wiring labels on your old thermostat or use a multimeter to identify the wires. The nest app also has a wiring guide that helps you match the wires to the corresponding terminals on the nest base.
Can A Nest Thermostat Work With My Existing Hvac System?
Yes, a nest thermostat can work with most hvac systems. It is compatible with gas, oil, electric, and dual fuel systems, as well as heat pumps with or without auxiliary heat. However, it’s always recommended to check the compatibility of your specific hvac system with nest before installation.
Can A Nest Thermostat Control Multiple Zones?
Yes, a nest thermostat can control multiple zones if you have a compatible zoned system. You will need to install a separate nest thermostat for each zone and set them up as multiple thermostats in the nest app. This allows you to control the temperature in each zone independently.
Conclusion
To sum it up, installing a nest thermostat can greatly enhance the comfort and energy efficiency of your home. By following this comprehensive wiring guide, you can confidently navigate the installation process and take full advantage of the thermostat’s features.
Remember to turn off the power before starting any wiring work and consult the nest app for further guidance. With its user-friendly interface and smart learning capabilities, the nest thermostat makes it easy to create a personalized heating and cooling schedule that suits your lifestyle.
Additionally, by adjusting the temperature based on occupancy and weather conditions, you can potentially save money on your energy bills. So, whether you’re a diy enthusiast or simply looking to upgrade your home’s thermostat, investing in a nest thermostat and following this wiring guide will undoubtedly bring comfort and convenience to your daily life.
Say hello to a more efficient and eco-friendly home!