


Contents
- Benefits Of Regularly Cleaning Your Window Fan
- Gather The Necessary Materials
- Ensure Safety Precautions
- Remove Dust And Debris
- Cleaning The Fan Grilles
- Remove The Fan Blades
- Clean The Blades
- Clean The Fan Motor
- Place The Cleaned Blades Back Into The Fan
- Reattach The Grilles
- Wipe The Exterior Surfaces Once More
- Keep The Fan Clean And Dust-Free
- Store The Fan Properly When Not In Use
- Frequently Asked Questions On How To Clean A Window Fan
- Conclusion
To clean a window fan, first, unplug it and remove the front grill. Then, use a brush or vacuum to remove dust from the fan blades and grill.
Wipe the blades with a damp cloth and clean the grill thoroughly. Finally, reassemble and plug in the fan. Window fans are a popular choice for keeping the air circulating and maintaining a comfortable environment in our homes. However, like any other appliance, window fans require regular maintenance to function efficiently.
Cleaning a window fan may seem like a daunting task, but with a few simple steps, you can keep your fan working effectively and extend its lifespan. We will guide you through the process of cleaning a window fan, ensuring that it operates optimally and circulates clean air throughout your living space. So, let’s dive into the necessary steps to clean your window fan and maintain its performance.
Benefits Of Regularly Cleaning Your Window Fan
Regularly cleaning your window fan is essential to maintain its efficiency and functionality. It helps remove dust, dirt, and allergens, ensuring better air quality and preventing potential malfunctions. Clean window fans also operate quietly and consume less energy, promoting a healthier and more comfortable living environment.
Regularly cleaning your window fan can provide numerous benefits that improve both the air quality in your home and the longevity of the fan itself. By taking the time to properly clean your window fan, you can enjoy fresher air, extend the lifespan of the fan, and even save on maintenance costs.
Let’s explore these benefits in more detail.
Improved Air Quality
- Removing dust and debris: A clean window fan is more effective in removing dust particles and debris from the air, ensuring cleaner and healthier indoor air quality.
- Filtering allergens: Regular cleaning helps to prevent allergens such as pollen, pet dander, and mold spores from circulating in your home, creating a more comfortable living environment.
- Reducing odors: A clean window fan helps eliminate unpleasant odors, keeping your home smelling fresh and inviting.
Regular cleaning of your window fan provides these benefits by keeping the air you breathe clean and free from common pollutants.
Increased Lifespan Of The Fan
- Preventing motor damage: Dust accumulation on the fan blades and motor can lead to overheating and premature motor failure. Regular cleaning prevents this build-up, helping to extend the lifespan of your window fan.
- Maintaining optimal performance: A clean fan operates efficiently, reducing strain on its components and minimizing the risk of mechanical breakdowns. This can save you from costly repairs or the need to replace the fan completely.
By regularly cleaning your window fan, you not only protect it from damage but also ensure its optimal performance and longevity.
Reduced Maintenance Costs
- Avoiding clogged filters: Cleaning the filters in your window fan prevents them from becoming clogged with dust and dirt, which can hinder airflow and strain the fan motor. This reduces the need for filter replacements and lowers maintenance costs.
- Enhancing fan functionality: A clean window fan is less likely to encounter operational issues, reducing the need for professional repairs or replacements.
- Saving on energy consumption: When your window fan is clean, it can operate more efficiently, consuming less energy and potentially lowering your electricity bills.
Regularly cleaning your window fan not only saves you money on maintenance costs but also contributes to a more energy-efficient home.
Taking the time to clean your window fan regularly brings numerous benefits. From improved air quality to increased fan lifespan and reduced maintenance costs, these advantages make regular cleaning well worth the effort. So, make sure to include window fan cleaning in your routine to enjoy a healthier and more comfortable living space.

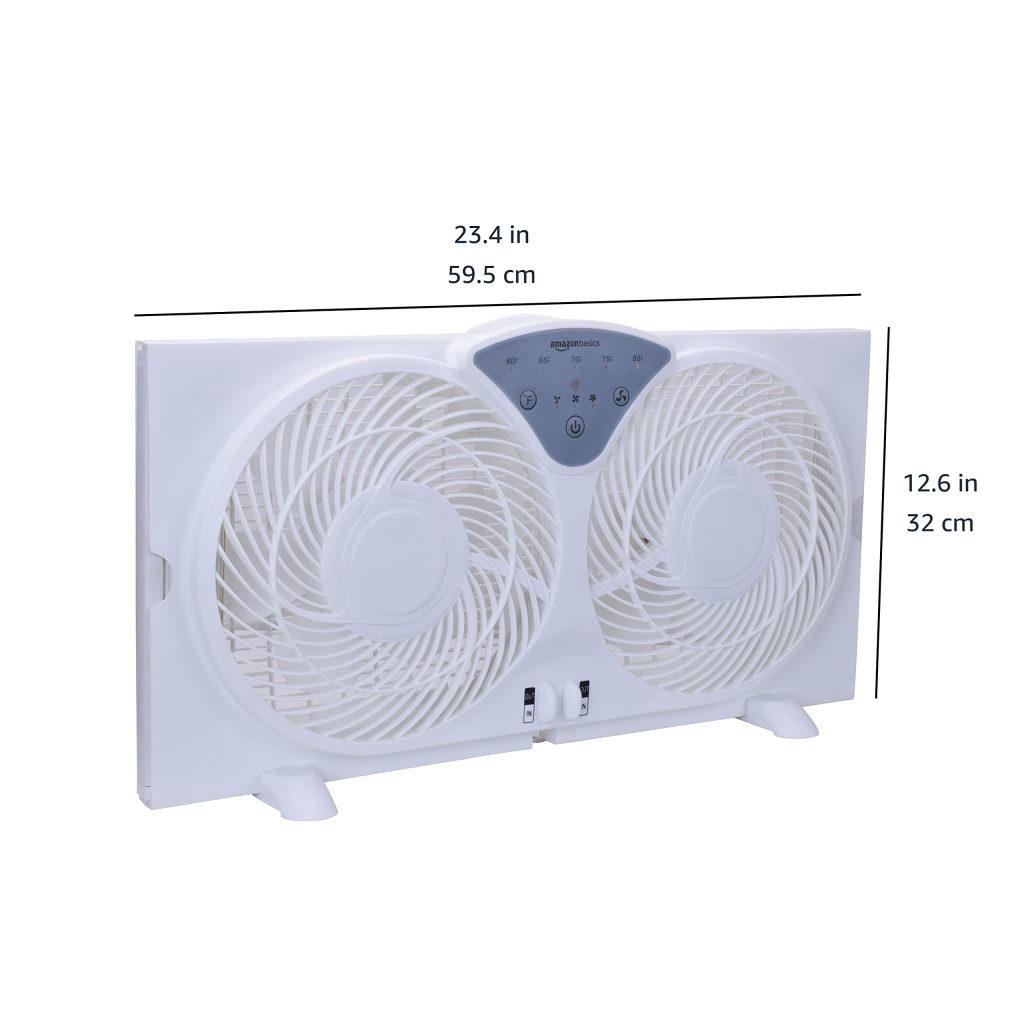
Credit: www.pella.com
Gather The Necessary Materials
When cleaning a window fan, gather all the necessary materials to ensure an effective and efficient process. This includes cleaning solution, a soft cloth or sponge, and a vacuum or brush to remove dust and debris.
To clean a window fan effectively, you’ll need a few materials on hand. These will make the cleaning process easier and more efficient. Here are the essential tools and supplies you’ll need:
- Screwdriver: A screwdriver comes in handy when removing the front grill or individual fan blades. Make sure to choose the appropriate size and type of screwdriver based on your window fan’s specifications.
- Cleaning Solution: Prepare a cleaning solution by mixing warm water with a mild detergent or vinegar. This mixture helps break down grime, dust, and grease accumulated on the fan.
- Microfiber Cloth: Opt for a microfiber cloth to wipe down the fan components. The fine fibers of the cloth trap dust particles effectively and prevent scratching on delicate surfaces.
- Vacuum Cleaner: Having a vacuum cleaner with a brush attachment will be useful for removing loose dust and dirt from the fan’s intake vents, grills, and blades.
Remember to gather all these materials before you start the cleaning process. Now that you have everything ready, let’s move on to the next steps of cleaning your window fan.
Ensure Safety Precautions
To clean a window fan, it is essential to prioritize safety precautions. Follow these steps to ensure a safe and effective cleaning process for your fan’s optimal performance.
Window fans are a great way to circulate air and keep your home cool during the warmer months. However, before diving into the cleaning process, it is essential to prioritize your safety. By following a few precautions, you can ensure a safe and hassle-free cleaning experience.
Disconnect The Fan From Power
To begin the cleaning process, it is crucial to disconnect the window fan from its power source. This will prevent accidental electric shock or any other mishaps during the cleaning process. Follow these steps to disconnect the fan properly:
- Turn off the fan by switching it to the off position.
- Unplug the fan from the power outlet.
- If your window fan is hardwired, make sure to turn off the circuit breaker or remove the fuse that powers the fan.
Remember, safety always comes first. Taking these precautions will minimize any potential risks.
Secure The Fan Blades
Before proceeding with the cleaning, it is essential to secure the fan blades to prevent any accidental injuries. Here’s how you can safely secure the fan blades:
- Locate the blade guard or grille on your window fan.
- If there are screws or fasteners holding the blade guard in place, use a screwdriver or appropriate tool to remove them.
- Gently detach the blade guard and set it aside.
- Take caution while handling the blades and avoid putting your fingers near the spinning mechanism.
Securing the fan blades will ensure that they do not move unexpectedly, reducing the risk of accidents during the cleaning process.
With these safety precautions in place, you can confidently proceed to clean your window fan without any concerns for your well-being. Remember to always prioritize safety when dealing with electrical appliances. Stay tuned for the next section, where we will dive into the step-by-step cleaning process for your window fan.
Remove Dust And Debris
Clean your window fan efficiently by removing dust and debris. Keep your fan running smoothly and maximize its performance with these simple steps.
How To Clean A Window Fan
Window fans are a great way to circulate fresh air into your home, keeping it cool and comfortable. However, over time, these fans can accumulate dust and debris, hindering their performance. Cleaning your window fan regularly is essential to maintain its efficiency and prevent any malfunctions.
In this section, we will focus on the first step of cleaning a window fan: removing dust and debris.
Use A Vacuum Cleaner To Remove Loose Dirt
To effectively remove loose dirt from your window fan, follow these steps:
- Begin by unplugging the fan from the power source to ensure safety.
- Choose a vacuum cleaner with a brush attachment or a handheld vacuum for convenience.
- Gently vacuum the exterior of the fan, concentrating on the intake and exhaust vents.
- Place the brush attachment against the vent grill and move it back and forth to dislodge any dust or debris.
- Repeat the process for each vent until all visible dirt has been removed.
- If your vacuum cleaner has a crevice tool, use it to clean any hard-to-reach areas, such as crevices or corners.
- Insert the crevice tool into these areas and move it carefully to suck out any accumulated dust or debris.
- For the best results, repeat this process on both sides of the fan.
Wipe The Exterior Surfaces With A Microfiber Cloth
Once you have removed loose dirt using a vacuum cleaner, it’s time to clean the exterior surfaces of your window fan.
- Dampen a microfiber cloth with water or a mild detergent solution.
- Gently wipe the entire exterior of the fan, including the vent grills, front cover, and any other visible areas.
- Pay special attention to removing stubborn dirt or stains from the fan’s surface.
- If necessary, apply a bit more pressure on problematic areas while wiping.
- Ensure that the cloth is not too wet to avoid any damage to the electrical components.
- Use a dry microfiber cloth to wipe away any excess moisture or residue from the fan’s surface.
By following these simple steps, you can effectively remove dust and debris from your window fan, ensuring its optimal performance and longevity. Regular cleaning of your fan will not only improve its efficiency but also help maintain a healthier indoor environment.
Stay tuned for our next section on cleaning the fan blades and grill.
Remember: a clean window fan equals fresh air for your home!
Cleaning The Fan Grilles
Cleaning the fan grilles of a window fan is essential for proper maintenance. By following these steps, you can easily remove the accumulated dirt and debris, ensuring optimal performance and a clean air flow.
Removing and cleaning the fan grilles is an essential step in keeping your window fan in top shape. Here’s a step-by-step guide on how to clean the grilles effectively:
Remove The Grilles According To The Manufacturer’S Instructions:
To ensure a safe and proper cleaning process, always consult the manufacturer’s instructions for removing the grilles. These instructions may vary depending on the model of your window fan.
Soak The Grilles In A Cleaning Solution:
Once the grilles are removed, prepare a cleaning solution by mixing warm water with a mild detergent. Submerge the grilles in the solution and allow them to soak for about 10-15 minutes. This will help loosen any dirt, dust, or grime accumulated on the grilles.
Scrub The Grilles With A Soft Brush:
After soaking, take a soft brush, such as a toothbrush or a small cleaning brush, and gently scrub the grilles to remove any remaining debris. Pay attention to the edges and corners where dirt tends to accumulate. Avoid using abrasive materials or excessive force to prevent damaging the grilles.
Rinse And Dry The Grilles Thoroughly:
Once you’ve scrubbed the grilles, rinse them under running water to remove any soapy residue. Ensure that all the detergent is washed away. After rinsing, pat the grilles dry with a clean cloth or allow them to air dry completely before reassembling the fan.
Keeping the fan grilles clean not only improves the fan’s performance but also extends its lifespan. By following these steps regularly, you can maintain a clean and efficient window fan that helps circulate fresh air throughout your space.
Remove The Fan Blades
To clean a window fan effectively, start by removing the fan blades. This step ensures easy access for cleaning and maintenance, allowing for improved performance and air quality.
When it comes to cleaning a window fan, one of the first steps is removing the fan blades. This is an important task to ensure a thorough cleaning and proper maintenance of your fan. Follow these steps to safely remove the fan blades:
Unscrew The Blade Cap:
- Locate the blade cap on the back of the fan.
- Use a screwdriver to carefully unscrew the blade cap in a counterclockwise motion.
- Keep the screws in a safe place, as they will be required later to reattach the blades.
Take Note Of The Blade’S Orientation:
- Before removing the blades, take note of their orientation.
- This will help you maintain the correct position when reassembling the fan.
- You can mark the blades with a marker or take a picture for reference.
Carefully Remove The Blades:
- Hold the fan with one hand to steady it.
- Using your other hand, grip the blades firmly but gently near the center.
- Slowly pull the blades straight out from the fan housing.
- Be cautious not to bend or damage the blades during removal.
Once you have successfully removed the fan blades, you are ready to proceed with the next steps in cleaning your window fan. Properly cleaning the fan blades will ensure they continue to function efficiently and maintain optimal airflow. Now, let’s move on to the next section and learn how to clean the blades effectively.
Clean The Blades
To clean a window fan effectively, make sure to clean the blades regularly. Remove the blades, wash them with warm soapy water, and then dry them thoroughly before reattaching them. By keeping the blades clean, you can ensure that your window fan operates efficiently and provides you with fresh, clean air.
Unlike other components of a window fan, the blades tend to collect a significant amount of dust and dirt over time. To ensure that your window fan functions optimally, it is crucial to clean the blades regularly. Here’s how you can effectively clean the blades:
Soak The Blades In A Cleaning Solution
- Prepare a cleaning solution by mixing warm water and a mild detergent in a bucket or sink.
- Remove the fan blades from the window fan unit. This step may vary depending on the model, so consult the manufacturer’s instructions if needed.
- Submerge the blades in the cleaning solution, ensuring that they are completely covered.
- Allow the blades to soak for about 15-20 minutes to loosen the dirt and grime.
Use A Soft Brush To Remove Stubborn Dirt
- After soaking, take a soft brush or toothbrush and gently scrub the blades to remove any stubborn dirt or debris.
- Pay special attention to the hard-to-reach areas between the blades.
- Be cautious not to apply excessive pressure to avoid bending or damaging the blades.
Rinse And Dry The Blades Completely
- Once you have thoroughly cleaned the blades, rinse them under running water to remove any remaining cleaning solution and dirt.
- Confirm that all the dirt has been removed by inspecting each blade carefully.
- Shake off any excess water, or use a clean cloth to gently wipe down the blades.
- Place the blades in a well-ventilated area and allow them to dry completely before reassembling the window fan.
Remember, cleaning the blades regularly will enhance the performance and lifespan of your window fan.
Clean The Fan Motor
If you want to know how to clean a window fan, it’s important to focus on cleaning the fan motor. By carefully removing dust and debris, you can ensure that your fan works efficiently and effectively all season long.
Window fans are a popular choice for many homeowners because of their ability to provide efficient and affordable cooling. However, like any appliance, they require regular maintenance to ensure optimal performance. We will focus on cleaning the fan motor, which is an essential task to keep your window fan running smoothly.
By following these simple steps, you can enhance the performance and longevity of your window fan.
Gently Vacuum Around The Motor Housing And Vents:
- Start by unplugging the window fan from the power source to avoid any accidents.
- Use a vacuum cleaner with a brush attachment to gently remove loose dust and debris from the motor housing and vents.
- Ensure that you reach all the nooks and crannies, as dust can accumulate in hard-to-reach areas.
- Avoid using excessive force while vacuuming to prevent damage to the motor or other internal components.
Use A Microfiber Cloth To Wipe Any Remaining Dust:
- After vacuuming, take a clean microfiber cloth and lightly dampen it with water or a mild cleaning solution.
- Gently wipe the motor housing and vents to remove any remaining dust or dirt.
- Be mindful not to use excessive moisture, as it can damage the motor.
- Pay attention to the blades and crevices, as they tend to collect more dirt and require thorough cleaning.
Regular maintenance of your window fan’s motor is vital to ensure optimal performance and prevent any issues that may arise from dust accumulation. By following these simple steps, you can keep your window fan running smoothly and efficiently for years to come.
Remember to perform this cleaning routine regularly, especially during heavy-use seasons. A clean window fan motor not only improves its efficiency but also contributes to a healthier indoor environment.
Place The Cleaned Blades Back Into The Fan
Once you have thoroughly cleaned the blades of your window fan, carefully place them back into the fan for optimal performance and airflow.
After thoroughly cleaning the blades of your window fan, it’s now time to place them back into the fan housing. Follow these steps to ensure the blades are aligned correctly and the fan is ready for use:
Align The Blades Correctly
To align the blades properly, follow these steps:
- Start by examining the cleaned blades. Ensure they are free from dust or debris that might hinder their performance.
- Orient the blades so that the side with the pitch markings is facing towards the front of the fan.
- Check the direction of the arrows on the blades. These arrows indicate the airflow direction. Ensure the arrows are pointing towards the front of the fan as well.
- Align each blade with its corresponding slot in the fan housing. Take your time to ensure they are positioned correctly to avoid any imbalances.
- Double-check that all the blades are aligned parallel to each other. This will promote smooth airflow and prevent unnecessary noise.
Screw The Blade Cap Back In Place
Now that the blades are aligned correctly, it’s time to secure them in place by screwing the blade cap back on. Follow these instructions:
- Locate the blade cap, which is usually a plastic or metal cover that encloses the blades.
- Position the blade cap over the blades, ensuring that it fits snugly.
- Insert the screws into the designated holes and tighten them securely. Be careful not to overtighten, as it could damage the fan.
- Verify that the blade cap is securely fastened by gently shaking the fan. It should feel solid and stable.
With the blades aligned correctly and the blade cap securely in place, your window fan is now ready to be used. Enjoy the refreshing breeze it will provide and remember to regularly clean and maintain your fan for optimal performance.
Reattach The Grilles
To effectively clean a window fan, it is essential to reattach the grilles after cleaning. This ensures proper functionality and prevents dust and debris from entering the fan.
Position The Grilles Properly
- The first step in reattaching the grilles of your window fan is to position them properly. Follow these guidelines to ensure the grilles are aligned correctly:
- Start by identifying the front and back grilles of the fan.
- Hold the front grille and align it with the front of the fan.
- Take the back grille and align it with the back of the fan.
- Make sure that both grilles are flush against the fan body.
- Ensure that the clips or tabs on the grilles are properly aligned with the corresponding slots on the fan.
Secure The Grilles According To The Manufacturer’S Instructions
- Once the grilles are positioned properly, it’s time to secure them according to the manufacturer’s instructions. Refer to the fan’s user manual or the instructions provided by the manufacturer for specific guidance. Here are some general steps to follow:
- Locate the clips or tabs on each grille that need to be secured.
- Align the clips or tabs with the corresponding slots on the fan.
- Gently press the grilles into place until you hear a click or feel them securely attach to the fan.
- Double-check that the grilles are securely fastened and not wobbly.
- If the manufacturer provides any additional steps or precautions for securing the grilles, be sure to follow them closely.
Remember, proper reattachment of the grilles is crucial for the safe and effective operation of your window fan. Following these steps will help ensure that the grilles are positioned correctly and securely fastened, providing you with a well-functioning fan that effectively circulates air in your space.

Wipe The Exterior Surfaces Once More
To clean a window fan, make sure to wipe the exterior surfaces once more. This final step helps to remove any remaining dirt or dust, leaving your fan looking fresh and clean.
After cleaning the interior components of your window fan, it’s important to give some attention to the exterior surfaces as well. This will ensure that your fan not only looks clean but also functions optimally. Here are some steps to follow when wiping the exterior surfaces of your window fan:
Use A Microfiber Cloth To Remove Any Remaining Dirt
- Begin by using a microfiber cloth to gently wipe down the outer casing of the fan. This will help to remove any remaining dirt or dust that may have accumulated.
- Make sure to go over all the nooks and crannies, paying close attention to the areas where dust tends to gather.
- If you encounter any stubborn dirt or grime, you can moisten the microfiber cloth slightly with water or a mild cleaning solution.
- Wipe the entire surface of the fan in a gentle, back-and-forth motion to ensure a thorough cleaning.
- Avoid using abrasive materials or harsh chemicals that could potentially damage the fan’s exterior.
By taking the time to wipe the exterior surfaces of your window fan, you can maintain its cleanliness and prevent dirt from circulating back into your living space. So grab a microfiber cloth, go over every inch of your fan, and enjoy clean, fresh air all season long.
Keep The Fan Clean And Dust-Free
Regular cleaning of your window fan is crucial to keep it functioning properly. Ensure that you keep the fan clean and free from dust for optimal performance and longevity.
Dust and dirt tend to accumulate on window fans over time, hindering their efficiency and reducing airflow. To ensure that your window fan functions effectively, you must keep it clean and dust-free. Follow these simple steps to maintain and prolong the lifespan of your window fan:
Regularly Vacuum The Fan Grilles And Exterior:
- Begin by turning off and unplugging the window fan for safety purposes.
- Use a vacuum cleaner with a brush attachment to gently vacuum the exterior surface of the fan. This will help remove any loose dirt and dust that might have settled on it.
- Pay close attention to the grilles on the front and back of the fan. Use the brush attachment to carefully vacuum between the grilles, ensuring that all debris is removed.
- If there are stubborn spots or greasy areas on the exterior of the fan, dampen a soft cloth with a mild detergent solution and carefully wipe them away.
- When dealing with the blades or motor assembly, avoid using water or liquid cleaners. Instead, clean them with a dry cloth or a small brush to remove any dirt or dust accumulation.
- Take extra care not to damage any delicate parts of the fan during the cleaning process.
Schedule Routine Cleaning To Maintain Efficiency:
- Set a cleaning schedule for your window fan, ensuring that it is cleaned at least once every few months or more frequently if you live in a dusty environment.
- Regularly monitor the fan’s performance and airflow. If you notice a decrease in performance, it may be an indication that the fan requires cleaning.
- Clean the fan more frequently during peak usage seasons or if you notice a buildup of dirt or grime.
- Remember to exercise caution and turn off the fan before starting the cleaning process to avoid any accidents.
- By following this routine cleaning schedule, you can maintain the efficiency of your window fan and enjoy its benefits for a longer period.
Regularly cleaning and dusting your window fan is crucial for maintaining its performance and prolonging its lifespan. By following these simple steps and incorporating routine cleaning into your schedule, you can ensure that your window fan remains in optimal condition, providing you with effective ventilation and cooling when you need it the most.
Store The Fan Properly When Not In Use
To ensure your window fan stays clean, make sure to store it properly when not in use. This will prevent dust and dirt from accumulating, keeping the fan in good working condition for longer.
Ensure The Fan Is Clean And Dry:
To properly store your window fan when it is not in use, it is essential to ensure that it is clean and dry. Here are a few steps to follow:
- Start by turning off and unplugging the fan. Safety first!
- Gently remove the front grille of the fan, taking care not to damage it.
- Wipe down the grille using a damp cloth or sponge to remove any dust or dirt that may have accumulated. Make sure to get into all the nooks and crannies.
- Next, detach the fan blades from the motor. This can usually be done by unscrewing a few screws or releasing a clip mechanism.
- Clean the fan blades using a mild detergent and warm water. Avoid using abrasive cleaners that may scratch the surface.
- Rinse the blades thoroughly and allow them to dry completely before reattaching them to the motor.
- Use a vacuum cleaner or a soft brush to remove any dust or debris from the motor housing and other internal components.
- Once everything is clean and dry, reassemble the fan, making sure all the parts are securely in place.
Store In A Cool, Dry Place To Prevent Dust Build-Up:
To keep your window fan in optimal condition and prevent dust build-up, it is important to store it in a cool and dry place. Here are some tips to help you with proper storage:
- Find a storage area that is away from direct sunlight and excessive humidity. These conditions can cause damage to the fan and promote the growth of mold or mildew.
- If possible, store the fan in a covered container or a dust cover to protect it from dust and debris.
- Avoid storing the fan in areas prone to temperature fluctuations, such as attics or basements, as this can affect its performance and lifespan.
- Ensure that the storage area is well-ventilated to prevent the accumulation of stale air and odors.
- If you live in an area with high humidity, consider using a dehumidifier in the storage space to reduce moisture levels.
- Before using the fan after a prolonged period of storage, inspect it for any signs of damage or wear. Replace any faulty parts before operating the fan again.
Remember, proper storage of your window fan is crucial to prolong its lifespan and maintain its efficiency. By following these simple steps, you can ensure that your fan is ready to provide cool and refreshing airflow whenever you need it.
Frequently Asked Questions On How To Clean A Window Fan
What Is The Best Way To Clean A Window Fan?
To clean a window fan, first, unplug it. Remove the front grill and wipe it with a damp cloth. Use a small brush to clean the blades and vacuum the dust. Reassemble and plug it back in.
Is There A Way To Clean A Fan Without Taking It Apart?
Yes, you can clean a fan without taking it apart by using a soft brush or vacuum cleaner.
Can You Clean A Window Fan With A Hose?
No, it is not recommended to clean a window fan with a hose.
How Do You Clean Greasy Dust Off A Fan?
To clean greasy dust off a fan, wipe it down with a damp cloth and mild detergent.
Conclusion
Keeping your window fan clean is essential for optimal performance and efficiency. Regular cleaning helps to remove dust, dirt, and other debris that can accumulate over time. By following the simple steps outlined in this blog post, you can ensure that your window fan remains clean and in good working order.
Remember to unplug the fan before cleaning, and use a soft cloth or brush to gently remove dirt from the blades and grilles. In some cases, you may need to disassemble the fan to access hard-to-reach areas. Be sure to read the manufacturer’s instructions for guidance on disassembly and reassembly.
By taking the time to clean your window fan regularly, you can enjoy fresh, cool air without any worries. So go ahead and give your window fan the cleaning it deserves, and enjoy its benefits all year round.