Contents
- Overview Of Homedics Air Purifier Red Light Reset
- Step-By-Step Guide For Homedics Air Purifier Red Light Reset
- Common Issues And Troubleshooting For Red Light Reset
- Regular Cleaning Of Filters
- Replacing Filters When Necessary
- Maintaining The Air Purifier Unit
- Creating A Clean Environment For The Air Purifier
- Setting The Air Purifier For Optimal Performance
- Additional Tips And Tricks For Better Performance
- Frequently Asked Questions Of Homedics Air Purifier Red Light Reset
- Conclusion
To reset the red light on a Homedics Air Purifier, follow the manufacturer’s reset instructions provided in the user manual. When it comes to using a Homedics Air Purifier, it’s important to know how to reset the red light indicator.
This light serves as a signal that the air purifier’s filters need to be replaced or cleaned. By following the reset instructions provided in the user manual, you can easily get rid of the red light and ensure that your air purifier is running optimally.
We will guide you on how to reset the red light on your Homedics Air Purifier, enabling you to breathe cleaner air in your home or office space.
Credit: www.nytimes.com
Overview Of Homedics Air Purifier Red Light Reset
The Homedics Air Purifier features a red light reset function to ensure optimal performance. This helpful feature allows users to easily maintain the air purifier’s efficiency by resetting the red light indicator when necessary. Keep your home clean and fresh with this convenient air purifier reset option.
The Homedics air purifier utilizes a red light indicator to communicate important information about your device’s performance. Understanding the role of the red light indicator and why it is important to reset it can help ensure optimal air purification in your living space.
Here’s what you need to know:
Understanding The Role Of The Red Light Indicator
The red light indicator on your Homedics air purifier serves as a visual cue to highlight specific aspects of its operation. Here are some key points to keep in mind:
- Red light indicator activation: When pollutants in the air are detected by the air purifier, the red light may turn on. This indicates the presence of potentially harmful particles in the environment.
- Filter replacement reminder: In some models, the red light may also serve as a reminder to replace the air purifier’s filter. Over time, the filter becomes less effective at capturing pollutants, and a replacement is necessary to maintain optimal performance.
- Monitoring air quality: The red light indicator serves as a gauge for the quality of the air around you. By paying attention to changes in the red light’s behavior, you can assess if there are significant variations in air purity.
- Real-time feedback: Rather than relying solely on guesswork, the red light indicator provides real-time feedback on the air purifier’s status. This allows you to take appropriate actions to ensure cleaner air in your home or office.
Why It Is Important To Reset The Red Light
Resetting the red light on your Homedics air purifier is crucial to enjoy continued effectiveness and accurate monitoring. Here’s why you should prioritize resetting the red light:
- Maintaining accurate readings: Over time, the air purifier’s red light indicator may become desynchronized and provide inaccurate readings. Resetting the red light helps recalibrate the device, ensuring that the measurements accurately reflect the quality of the air.
- Reminder for filter replacement: If the red light is a reminder for filter replacement, resetting it after changing the filter ensures that you won’t miss any crucial maintenance tasks. This helps maximize the air purifier’s efficiency in capturing pollutants.
- Promoting optimal performance: By resetting the red light, you are essentially optimizing the air purifier’s function. This allows it to operate at its best, efficiently purifying the air and providing a cleaner and healthier environment for you and your family.
Remember, regular maintenance and resetting the red light of your Homedics air purifier can help maximize its longevity and performance. Stay vigilant in resetting the red light to ensure the device continues to work effectively in creating a cleaner and safer living environment.
Step-By-Step Guide For Homedics Air Purifier Red Light Reset
Resetting the red light on your Homedics Air Purifier is easy with this step-by-step guide. Just follow these instructions to quickly resolve the issue and enjoy clean air in your home.
If you’re facing the frustrating issue of a red light indicator on your Homedics air purifier, there’s a simple solution – resetting the device. By following these step-by-step instructions, you’ll be able to reset the red light and get your air purifier running smoothly again.
Checking The User Manual For Specific Instructions:
Before attempting to reset the red light on your Homedics air purifier, it’s always a good idea to consult the user manual for any specific instructions. The user manual will provide guidance on the exact process for resetting the device and help ensure that you complete the reset correctly.
Locating The Reset Button On The Purifier:
To reset the red light on your Homedics air purifier, you’ll need to locate the reset button on the device. This button is usually positioned on the control panel or the back of the purifier. Take a close look at your air purifier and find the reset button before proceeding to the next step.
Pressing And Holding The Reset Button:
Once you’ve located the reset button, it’s time to reset the red light on your Homedics air purifier. Press and hold down the reset button for approximately 5 to 10 seconds. It’s important to firmly press and hold the button until you see the red light indicator blink or go off, indicating that the reset process is complete.
Observing The Red Light Indicator After Resetting:
After successfully resetting the red light on your Homedics air purifier, take a moment to observe the red light indicator. Ensure that the red light is no longer illuminated or blinking. If the red light remains on or starts blinking again, try repeating the reset process.
If the issue persists, refer to the user manual for further troubleshooting options or contact customer support for assistance.
Remember, following the correct steps for resetting the red light on your Homedics air purifier is crucial to resolving any issues and maintaining optimal performance. By consulting the user manual, locating the reset button, pressing and holding it, and observing the red light indicator, you can effectively reset your air purifier and enjoy cleaner, fresher air in your home.
Common Issues And Troubleshooting For Red Light Reset
The Homedics Air Purifier may experience common issues with the red light reset function. This troubleshooting guide helps you identify and resolve these problems, ensuring optimal performance of your air purifier.
If you own a Homedics Air Purifier and are experiencing issues with the red light reset, don’t worry, you’re not alone. Many users have encountered common problems that can be easily resolved with a few troubleshooting techniques. In this section, we will address the most frequently reported issues and provide solutions to help you get your air purifier functioning properly again.
Red Light Still On After Reset
- Ensure that the air purifier is plugged in properly and receiving power.
- Check the filter to see if it has been installed correctly. Remove it and reinstall it, making sure it fits securely.
- Clean the filter, as a dirty or clogged filter can cause the red light to remain on.
- Verify that the timer is not set to turn off the air purifier automatically, as this could be the reason for the red light.
Red Light Flashing Or Blinking
- Check for any obstructions that may be blocking the air intake or outlet vents. Clear them away to allow for proper airflow.
- Check the filter replacement indicator. If it is flashing, it may be time to replace the filter. Refer to the user manual for instructions on how to replace it.
- Reset the air purifier by turning it off and unplugging it from the power source. Wait for a few minutes, then plug it back in and turn it on again. This may resolve the issue.
Troubleshooting Techniques For Unresolved Issues
If you have tried the previous troubleshooting steps and are still experiencing issues with the red light reset, here are a few additional techniques you can try:
- Perform a factory reset by referring to the user manual for instructions specific to your model.
- Contact Homedics customer support for further assistance. They have a team of experts who can help diagnose and resolve any issues you may be facing.
- Consider seeking professional help if all else fails. An experienced technician can inspect your air purifier and determine if there are any underlying issues that need to be addressed.
Remember, it’s important to follow the manufacturer’s instructions and recommendations when troubleshooting your Homedics Air Purifier. By doing so, you can ensure that you are taking the necessary steps to resolve any issues and maintain optimal performance.
Regular Cleaning Of Filters
Regularly cleaning the filters of your Homedics Air Purifier is essential to maintain its effectiveness. By resetting the red light, you ensure that your air purifier continues to provide clean and fresh air to breathe.
Importance Of Clean Filters For Air Purification
Regular cleaning of filters is essential to maintain the optimal performance of your Homedics air purifier. Clean filters ensure that the air you breathe is free from pollutants, allergens, and other harmful particles. Here are some reasons why clean filters are crucial for effective air purification:
- Improved Air Quality: Clean filters actively trap and remove airborne particles such as dust, pet dander, pollen, and mold spores. By regularly cleaning the filters, you eliminate these pollutants, resulting in improved indoor air quality.
- Increased Efficiency: Over time, filters accumulate dirt and debris, which can hinder the airflow of the air purifier. This can lead to reduced efficiency and compromised performance. Cleaning the filters helps maintain proper airflow and ensures the purifier works efficiently.
- Prolonged Lifespan: Neglecting to clean the filters can cause them to become clogged, making the air purifier work harder to circulate the air. This strain can put additional stress on the unit, potentially leading to premature wear and tear. By regularly cleaning the filters, you extend the lifespan of your Homedics air purifier.
Steps For Cleaning The Filters Properly
To ensure that your air purifier continues to function optimally, follow these steps to clean the filters properly:
- Power Off and Unplug: Before cleaning the filters, make sure the air purifier is turned off and unplugged from the power source. This ensures your safety during the cleaning process.
- Remove the Filters: Open the air purifier according to the manufacturer’s instructions and locate the filters. Take out the filters carefully, ensuring not to damage them.
- Vacuum the Filters: Use a vacuum cleaner with a soft brush attachment to gently remove the accumulated dust and debris from the filters. Be thorough but gentle to avoid damaging the filters.
- Rinse with Water: Fill a sink or basin with lukewarm water and submerge the filters. Gently agitate them to dislodge any remaining dirt. Avoid using hot water as it may damage the filters.
- Air Dry Completely: Remove the filters from the water and let them air dry completely. Ensure they are completely dry before reinstalling them to prevent the growth of mold or mildew.
- Reinstall the Filters: Once the filters are dry, carefully reinsert them back into the air purifier following the manufacturer’s instructions. Ensure they are properly secured in place.
- Power On and Reset: Plug in the air purifier, turn it on, and reset the red light indicator. Refer to the manual for the specific reset procedure for your Homedics air purifier model.
By following these simple steps, you can effectively clean the filters of your Homedics air purifier, ensuring optimal performance and healthier indoor air quality. Regular maintenance will help you enjoy clean and purified air in your home or office environment.
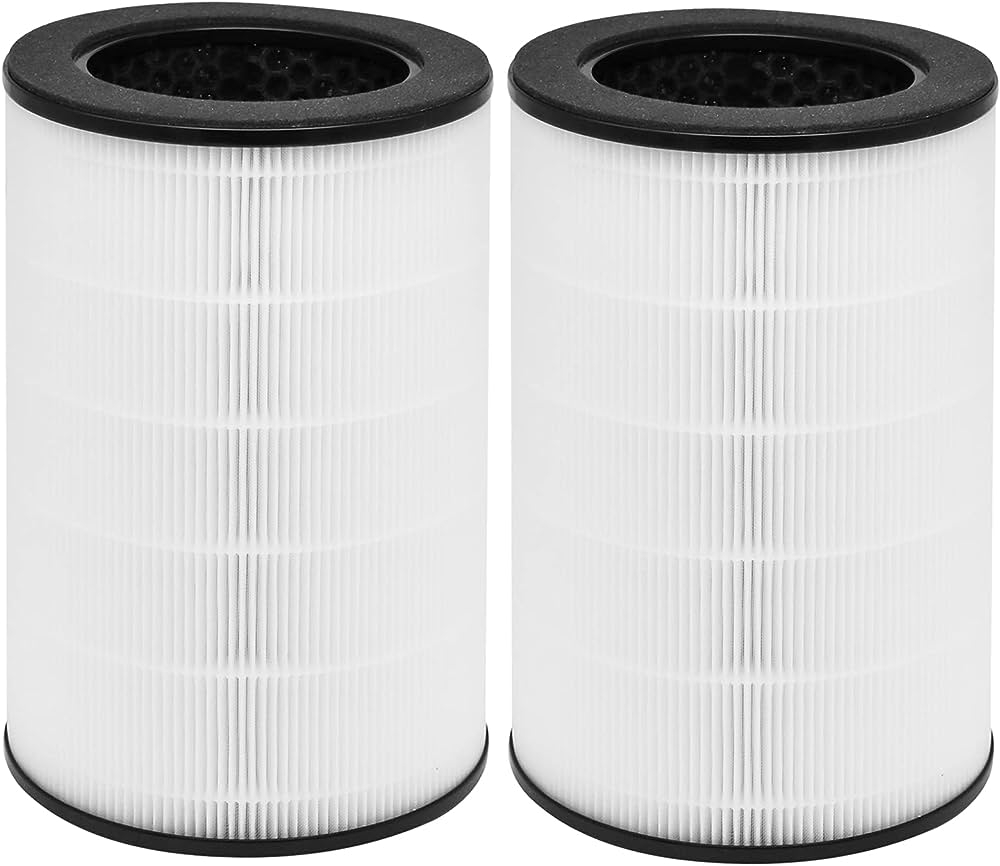
Replacing Filters When Necessary
When the red light on your Homedics Air Purifier is reset, it’s time to replace the filters. Ensure clean and fresh air in your home by replacing filters when necessary.
Signs That Indicate The Need For Filter Replacement:
- Diminished air quality: If you notice a decline in the air quality within your home, such as increased dust particles or unpleasant odors, it may be a sign that your Homedics air purifier requires a filter replacement.
- Reduced airflow: When your air purifier fails to provide the same level of airflow as before, it’s time to check the filters. Over time, accumulation of dirt and debris can hinder the airflow, indicating the need for replacement.
- Red light indicator: Additionally, the specific Homedics air purifier model you own may have a red light indicator that illuminates when the filter needs to be replaced. This is a convenient visual cue to keep track of filter maintenance.
Step-By-Step Guide For Filter Replacement:
- Turn off the air purifier: Before starting the filter replacement process, make sure to switch off the unit to ensure safety.
- Open the access panel: Locate the access panel on your Homedics air purifier. This can usually be found on the back or side of the device. Remove the panel to access the filters.
- Remove the old filters: Carefully take out the old filters from their designated slots. Be cautious not to damage any other components in the process.
- Dispose of old filters: Once the old filters are removed, dispose of them in an appropriate manner according to local guidelines. This may include placing them in a sealed bag for disposal.
- Install the new filters: Take the new filters and insert them firmly into their respective slots, ensuring they are securely in place.
- Close the access panel: Once the new filters are installed, close the access panel securely.
- Power on the air purifier: Turn on the air purifier and check that it functions properly. The red light indicator should reset, indicating the successful replacement of the filters.
- Regular filter maintenance: To ensure optimal air purification, it is recommended to follow the manufacturer’s guidelines on regular filter maintenance. This may include cleaning or replacing the filters at recommended intervals.
Regularly replacing the filters in your Homedics air purifier is vital to maintain its efficiency in purifying the air you breathe. By keeping an eye out for signs of filter wear and tear and following the step-by-step guide for filter replacement, you can enjoy the benefits of clean air within your living spaces.
Maintaining The Air Purifier Unit
To reset the red light on your Homedics Air Purifier, follow these simple maintenance steps. Clean the filters regularly, replace them when needed, and ensure the unit is placed in a well-ventilated area for optimal performance.
Air purifiers are an essential tool in ensuring clean and fresh air in your home. However, to keep them functioning optimally, proper maintenance is crucial. In this section, we will discuss the key aspects of maintaining your Homedics air purifier unit.
From placement tips for effective air purification to cleaning the exterior and conducting regular maintenance checks, we will cover everything you need to know.
Proper Placement For Effective Air Purification
To maximize the effectiveness of your Homedics air purifier, consider the following placement tips:
- Choose a central location: Place the air purifier in a central spot in the room for better air circulation and more efficient purification.
- Avoid obstacles: Keep the unit away from walls, furniture, or other objects that may obstruct the airflow.
- Optimal height: For effective purification, place the air purifier at least one to two feet above the floor.
Cleaning The Exterior Of The Unit
Regularly cleaning the exterior of your Homedics air purifier will not only ensure its longevity but also prevent the buildup of dust and allergens. Here’s how you can clean the exterior:
- Unplug the unit: Before cleaning, always unplug the air purifier to avoid any accidents.
- Use a soft cloth: Moisten a soft cloth with mild soap and water, and gently wipe the exterior surfaces, including the control panel.
- Avoid harsh chemicals: Harsh chemicals or abrasive cleaners can damage the unit’s finish, so it’s best to stick to mild, non-abrasive solutions.
- Dry thoroughly: After cleaning, make sure to dry the exterior completely before plugging the unit back in.
Regular Maintenance Checks For Optimal Performance
Performing regular maintenance checks on your Homedics air purifier will help maintain its optimal performance. Follow these maintenance procedures:
- Filter replacement: Check the manufacturer’s instructions to determine the recommended filter replacement frequency. Replace the filters as recommended to ensure efficient air purification.
- Dusting the unit: Use a clean, dry cloth or a soft brush to remove dust and debris from the unit’s vents and grilles. Regular dusting prevents clogs and ensures proper airflow.
- Check the indicator lights: Pay attention to any indicator lights that might appear on the control panel. These lights can alert you to issues such as a full filter or a need for cleaning.
By following these simple maintenance practices, you can ensure that your Homedics air purifier operates at its best, providing you with cleaner and healthier air in your home. Taking care of your air purifier will not only extend its lifespan but also enhance your overall indoor air quality.
Creating A Clean Environment For The Air Purifier
Keep your Homedics air purifier running smoothly by creating a clean environment and resetting the red light. Improve indoor air quality effortlessly.
Tips For Reducing Indoor Pollutants:
Maintaining a clean and healthy environment in your home is crucial, especially when it comes to the air you breathe. By reducing indoor pollutants, you can significantly improve the effectiveness of your Homedics Air Purifier. Here are some helpful tips to create a clean environment and maximize the performance of your air purifier:
- Regularly clean your home: Dust, allergens, and pollutants can settle on surfaces and become airborne when disturbed. Make sure to regularly dust and vacuum your home to minimize the amount of allergens and particles in the air.
- Keep windows and doors closed: While fresh air is important, it’s essential to keep windows and doors closed, especially if you live in an area with high levels of outdoor pollutants. This prevents pollutants from entering your home and reduces the burden on your air purifier.
- Avoid smoking indoors: Smoking indoors releases harmful chemicals and particulate matter into the air, severely compromising the air quality. If you or anyone in your household smokes, it’s crucial to do so outside to maintain a healthy indoor environment.
- Control humidity levels: High humidity can promote mold growth and the spread of allergens. Invest in a dehumidifier to keep humidity levels within the recommended range of 30-50%. This helps prevent mold, mildew, and dust mites from thriving, ensuring cleaner air.
- Regularly change your air purifier filters: Air purifier filters play a vital role in trapping and removing pollutants from the air. To ensure optimal performance, it’s important to change the filters as recommended by the manufacturer. This keeps your air purifier working at its best, effectively capturing allergens and particles in the air.
- Avoid using harsh chemicals: Many household cleaning products contain chemicals that can release harmful VOCs (volatile organic compounds) into the air. Opt for natural, eco-friendly alternatives or make your own cleaning solutions using simple ingredients such as vinegar and baking soda.
- Keep pets clean: Pets can bring allergens and pollutants into your home. Regularly grooming your pets and keeping their living areas clean can help minimize the amount of pet dander and hair in the air.
- Use a doormat: Placing a doormat at the entrance of your home can help reduce the amount of dirt, pollen, and other outdoor pollutants that get tracked indoors. Encourage family members and guests to wipe their feet before entering.
- Ensure proper ventilation: Proper airflow and ventilation are essential for maintaining good indoor air quality. Make sure that your home is adequately ventilated by opening windows or using exhaust fans in areas prone to moisture, such as the bathroom and kitchen.
- Avoid excessive use of scented products: Fragrances from candles, air fresheners, and scented cleaning products can release harmful chemicals into the air. Opt for unscented or naturally scented alternatives to maintain a healthier indoor environment.
By following these tips and creating a clean environment, you can optimize the performance of your Homedics Air Purifier. Remember, cleaner air means a healthier and more comfortable living space for you and your family.
Setting The Air Purifier For Optimal Performance
Optimize the performance of your Homedics Air Purifier by resetting the red light indicator. Keep your indoor air quality at its best with these simple steps. Say goodbye to pollutants and breathe easy again.
With the Homedics Air Purifier, achieving clean and breathable air is just a few simple steps away. Understanding the different settings and utilizing additional features can enhance the purification process, ensuring that you and your loved ones enjoy the best air quality at all times.
In this section, we will explore the various settings of the air purifier, how to adjust them based on specific needs or conditions, and the additional features available for enhanced purification.
Understanding The Different Settings Of The Air Purifier:
- Auto Mode: By selecting this mode, the air purifier adapts to the current air quality, automatically adjusting the fan speed and operation to eliminate impurities. It continuously monitors the air and optimizes its performance accordingly, providing hassle-free and efficient purification.
- Manual Mode: In this mode, you have complete control over the air purifier’s settings and can manually adjust the fan speed and operation according to your preferences. Whether you want a quiet operation during sleep or a more intensive purification during peak pollution hours, manual mode allows customization.
- Sleep Mode: Designed specifically for nighttime use, this mode ensures a quiet and undisturbed sleep while maintaining efficient air purification. It reduces fan speed and dims the lights, creating a peaceful environment conducive to restful sleep.
Adjusting Settings Based On Specific Needs Or Conditions:
- Fan Speed: The air purifier offers multiple fan speed options to suit different needs. While the higher speeds provide quicker and more intensive purification, lower speeds offer quieter operation. Adjusting the fan speed according to your requirements ensures optimal performance without compromising comfort.
- Timer: With the timer function, you can set the air purifier to operate for a specific duration, whether it’s a few hours or throughout the day. This feature helps conserve energy and allows you to customize the purification schedule based on your routine.
Utilizing Additional Features For Enhanced Purification:
- Ionizer: The built-in ionizer disperses negatively charged ions into the air, attaching them to airborne particles and making them easier to trap in the purifier’s filter. This additional feature enhances the purification process, ensuring that even the smallest particles are removed, and the air quality is further improved.
- UV-C Light: The air purifier comes equipped with a germicidal UV-C light that helps eliminate bacteria, viruses, and mold spores. This powerful feature adds an extra layer of protection to ensure the air you breathe is not only clean but also free from harmful microorganisms.
- Filter Indicator: The filter indicator alerts you when it’s time to replace the filter, ensuring that the air purifier continues to operate at its best. Regular filter replacement is essential for maintaining optimal performance and maximizing the air purifier’s lifespan.
By understanding the different settings, adjusting them based on specific needs, and utilizing additional features, you can ensure that your Homedics Air Purifier operates at its peak performance, providing you with clean and fresh air to breathe. Enjoy the benefits of optimal indoor air quality and create a healthier living environment for you and your family.
Additional Tips And Tricks For Better Performance
Discover effective tips and tricks to enhance the performance of your Homedics Air Purifier by easily resetting the red light. Improve your air quality effortlessly and enjoy a cleaner and healthier environment at home.
Using the air purifier in the right room size:
- Determine the size of the room where you plan to use the Homedics Air Purifier. Consider the square footage and dimensions to ensure that the purifier is suitable for the space.
- Choose the appropriate air purifier model based on room size recommendations provided by Homedics or the manufacturer. This ensures maximum efficiency and effectiveness in removing pollutants from the air.
- If your room size falls in between recommended sizes, opt for a larger model to ensure optimal performance.
Optimal placement for maximum efficiency:
- Place the air purifier in a central location within the room to allow for proper air circulation and distribution.
- Avoid obstructing the air inlet or outlet vents of the purifier, as it could hamper its effectiveness.
- Keep the purifier away from walls, furniture, or other objects that may restrict airflow.
- Consider positioning the purifier at least a few feet away from doors, windows, or other sources of outdoor pollutants to prevent them from easily entering the room.
Taking advantage of programmable features:
- Familiarize yourself with the programmable features available on your Homedics Air Purifier. These features allow for customized settings and more efficient operation.
- Set the timer function to run the air purifier during specific time periods, such as when you’re not at home or during particular hours of the day when allergens are more prevalent.
- Explore the different fan speed options and adjust accordingly based on the level of air quality in your room.
- Utilize the sleep mode or night mode option, which usually provides quieter operation and dimmer lights to ensure a peaceful sleep.
Remember, proper maintenance and regular filter replacements are crucial for the long-term performance of your air purifier. By following these additional tips and tricks, you can enhance the efficiency and effectiveness of your Homedics Air Purifier in purifying the air in your home or office.
Frequently Asked Questions Of Homedics Air Purifier Red Light Reset
How Do I Reset The Red Light On My Air Filter?
To reset the red light on your air filter, locate the reset button, press and hold it for a few seconds.
Why Is My Air Purifier Stuck On Red?
Your air purifier may be stuck on red due to a low filter life or a malfunctioning sensor.
How Do You Reset The Clean Indicator On Homedics?
To reset the clean indicator on Homedics, follow these steps: Unplug the device, remove the filter, clean it thoroughly, replace the filter, and then plug in the device again.
How Do You Reset The Red Light On A Blue Air Purifier?
To reset the red light on a blue air purifier, follow these steps. Disconnect the power cord and wait for 5 minutes. Reconnect the power cord and press the reset button. The red light should now be reset.
Conclusion
To conclude, resetting the red light on your Homedics Air Purifier is a simple process that can ensure your purifier continues to function effectively. By following the steps mentioned in this blog post, you can easily troubleshoot the issue and get your purifier back up and running in no time.
Remember to check for any clogged filters or obstructions, and to make sure the device is properly connected to a power source. Regularly maintaining and cleaning your air purifier is essential for optimal performance and the longevity of the machine.
Don’t forget to consult the product manual or contact customer support if you encounter any difficulties during the reset process. With these steps, you can enjoy cleaner and fresher air in your home or office space. Don’t let the red light keep you from breathing easy!