Contents
- Reasons For A Homedics Air Purifier Blinking Red Light
- Lack Of Filter Replacement
- Sensor Malfunction
- Power Supply Problems
- Troubleshooting Steps To Solve Homedics Air Purifier Blinking Red Light
- Check And Clean The Air Quality Sensor
- Replace Expired Filters
- Resetting The Air Purifier
- Proactive Measures To Avoid Homedics Air Purifier Blinking Red Light
- Regular Filter Maintenance
- Proper Placement And Usage
- Routine Cleaning And Maintenance
- Frequently Asked Questions On Homedics Air Purifier Blinking Red
- Conclusion
The Homedics Air Purifier blinking red indicates an error or issue with the device’s operation, requiring attention or troubleshooting. An air purifier is an essential appliance for maintaining clean and healthy indoor air quality.
However, experiencing a blinking red light on your Homedics Air Purifier can be concerning. This article will explore the possible causes of the blinking red light and provide you with troubleshooting tips to resolve the issue. By identifying and addressing the problem, you can ensure that your air purifier is functioning optimally and effectively eliminating airborne contaminants in your environment.
Reasons For A Homedics Air Purifier Blinking Red Light
A blinking red light on your Homedics Air Purifier might indicate issues like a dirty filter, the need for a replacement filter, or an error with the device. It’s essential to address the problem promptly to ensure optimal air purification.
Understanding The Common Causes Of The Blinking Red Light:
When you notice your Homedics Air Purifier’s light blinking red, it can be a cause for concern. But fear not, as there are several common reasons why this may occur. Let’s delve into the possible explanations for that blinking red light.
Lack Of Filter Replacement:
- Over time, air purifier filters get clogged with pollutants, reducing their effectiveness. This can trigger the red light to blink as a reminder to replace the filter promptly.
- Make sure you check the user manual or manufacturer’s guidelines for the recommended filter replacement frequency.
- Not replacing the filter in a timely manner can compromise the air purifier’s performance and negatively impact the air quality in your home.
Sensor Malfunction:
- The blinking red light might indicate a malfunctioning sensor in your Homedics Air Purifier.
- Sensors detect the air quality and adjust the purifier’s settings accordingly. If the sensor is not working correctly, it may trigger the red light to blink.
- Try cleaning the sensor or contacting Homedics customer support for assistance.
Power Interruption:
- A momentary power interruption or fluctuation can cause the red light on your air purifier to blink.
- Check if the power cord is securely connected and if there are any tripped breakers or blown fuses in your home’s electrical system.
- If the blinking red light persists after addressing any power issues, it could indicate a different underlying problem.
Internal Error Or Malfunction:
- The blinking red light may be a sign of an internal error or malfunction in your Homedics Air Purifier.
- In such cases, it is recommended to turn off the purifier, unplug it, and wait for a few minutes before plugging it back in.
- If the red light continues to blink, consult the manufacturer’s troubleshooting guide or seek professional assistance.
Clogged Air Intake:
- Dirt and debris can accumulate in the air intake vents of your air purifier, impeding proper airflow.
- A blinking red light may appear as a result, indicating that the purifier is struggling to function optimally.
- Regularly clean the air intake vents by gently removing any obstruction or using a vacuum cleaner with a soft brush attachment.
Summary:
- The blinking red light on your Homedics Air Purifier can indicate various issues, including the need for filter replacement, sensor malfunction, power interruption, internal errors, or a clogged air intake.
- Regular maintenance, filter replacement, and troubleshooting steps can help resolve the blinking red light issue and ensure your air purifier functions effectively to improve air quality in your home.
Lack Of Filter Replacement
The Homedics Air Purifier blinks red due to lack of filter replacement, impacting its performance and air quality. Ensure timely filter changes for optimal functioning and a healthier environment.
Having a blinking red light on your Homedics air purifier can be a cause for concern. One common reason for this issue is a lack of filter replacement. Regularly replacing the filters in your air purifier is crucial for its optimal performance and maintaining clean and healthy indoor air.
In this section, we’ll discuss the importance of regularly replacing air purifier filters, the impact of expired filters on air purifier performance, and the recommended filter replacement frequency for Homedics air purifiers.
Importance Of Regularly Replacing Air Purifier Filters:
- Filters play a vital role in capturing airborne particles and pollutants, ensuring that the air you breathe is clean and fresh.
- Over time, filters can become clogged with pollutants, dust, and allergens, reducing their effectiveness in purifying the air.
- Regular filter replacement helps maintain the air purifier’s efficiency and ensures a continuous supply of clean air in your home.
- Failure to replace filters in a timely manner can result in reduced air purifier performance and compromised indoor air quality.
Impact Of Expired Filters On Air Purifier Performance:
- Expired filters can no longer effectively trap pollutants, allergens, and particles in the air, allowing them to circulate back into your living space.
- A clogged or expired filter can strain the air purifier’s motor and reduce its airflow, resulting in decreased purification efficiency.
- Inadequate filtration can lead to poor indoor air quality, triggering allergies, respiratory issues, and other health concerns.
- A blinking red light on your Homedics air purifier is often an indicator of a filter that needs replacement, signaling the potential impact on the device’s performance.
Recommended Filter Replacement Frequency For Homedics Air Purifiers:
- It is generally recommended to replace the filters in your Homedics air purifier every 6-12 months, depending on usage and the specific model.
- For households with pets, frequent cooking, or individuals with respiratory conditions, it may be necessary to replace the filters more frequently.
- Be sure to consult your air purifier’s user manual or the manufacturer’s guidelines for the recommended filter replacement frequency specific to your model.
- Regularly monitoring the filter’s condition and replacing it promptly will help maintain optimal air purifier performance and ensure cleaner air in your home.
Remember, regularly replacing the filters in your Homedics air purifier is essential for efficient air purification. By adhering to the recommended filter replacement frequency and addressing the issue of a blinking red light promptly, you can enjoy cleaner, healthier air in your living space.
Sensor Malfunction
The Homedics Air Purifier is experiencing a sensor malfunction, causing the device’s red light to blink continuously. This issue may indicate a problem with the air quality detection system, requiring troubleshooting or professional assistance for proper resolution.
Air purifiers are a popular household essential, helping to improve indoor air quality by removing contaminants and allergens. However, sometimes you may encounter issues with your Homedics air purifier, such as the blinking red light indicating a sensor malfunction. In this section, we will explore how air purifier sensors work, the possible reasons for sensor malfunction, and troubleshooting steps to fix sensor issues.
How Air Purifier Sensors Work:
- Air purifiers are equipped with sensors that detect the air quality in your environment.
- These sensors measure various factors such as particle concentration, volatile organic compounds (VOCs), and odor levels.
- By continuously monitoring the air quality, the sensors determine the effectiveness of the filtration system and control the purifier’s operations accordingly.
Possible Reasons For Sensor Malfunction:
- Dirty or blocked air intake: Accumulation of dust, pet hair, or other debris can hinder the sensors’ functionality.
- Sensor calibration issue: Sometimes, the sensor calibration may go out of sync due to power interruptions or other factors, causing a malfunction.
- Component failure: Like any electronic device, the sensors can experience hardware failures over time, leading to malfunction.
Troubleshooting Steps To Fix Sensor Issues:
- Step 1: Check the air intake area: Ensure that the air intake vent and the surrounding area are clean and free from obstructions. Remove any blockage and make sure nothing is hindering the airflow.
- Step 2: Power cycle the air purifier: Turn off the air purifier, unplug it from the power source, and wait for a few minutes. Then, plug it back in and turn it on. This power cycle can sometimes reset the sensor and resolve the malfunction.
- Step 3: Perform a sensor reset: Refer to your Homedics air purifier’s manual for instructions on how to reset the sensor. This process typically involves pressing specific buttons or following a sequence of steps to recalibrate the sensor.
- Step 4: Clean or replace the sensors: If the malfunction persists, you may need to clean or replace the sensors. Consult the product manual for guidance on how to clean or obtain replacement sensors, if necessary.
Remember, troubleshooting steps may vary depending on the specific model of your Homedics air purifier. It is always recommended to consult the product manual or contact the manufacturer’s customer support for comprehensive guidance tailored to your device.
By understanding how air purifier sensors work, identifying potential reasons for sensor malfunction, and following troubleshooting steps, you can address the blinking red light issue on your Homedics air purifier and ensure optimal performance in maintaining clean and fresh air in your home.
Power Supply Problems
The Homedics Air Purifier may experience power supply problems if the red light is blinking. This issue could be caused by a faulty power cord or a malfunctioning power outlet. It is important to address these problems promptly to ensure the air purifier functions efficiently.
Checking The Power Source And Connection
- Ensure that the air purifier is plugged into a functional power outlet.
- Check if the power cord is securely connected to both the air purifier and the power outlet.
- Verify that the power outlet is switched on and providing electricity.
- In case you are using an extension cord, confirm that it is in good condition and not overloaded.
- Try plugging the air purifier into a different power outlet to eliminate the possibility of a faulty outlet.
Addressing Issues With Power Supply
- Examine the power cord for any signs of damage, such as frayed wires or exposed insulation.
- If the power cord appears damaged, discontinue use immediately and contact Homedics for a replacement.
- Make sure that the power switch on the air purifier is turned on and functioning correctly.
- Check if there are any tripped circuit breakers or blown fuses in your home’s electrical panel.
- Confirm that the air purifier is not within close proximity to other electronic devices that may cause interference.
Steps To Reset The Air Purifier For Power-Related Problems
Here are the steps to reset your Homedics Air Purifier if you are experiencing power-related problems:
- Unplug the air purifier from the power source and wait for at least 30 seconds.
- Press and hold the power button on the air purifier for around 5 seconds.
- Plug the air purifier back into the power outlet.
- Ensure that the power cord is securely connected to both the air purifier and the power outlet.
- Turn on the air purifier and observe if the blinking red light issue persists.
If the above steps do not resolve the power-related problems with your Homedics Air Purifier, it is advisable to contact Homedics customer support for further assistance.
Remember, to maintain optimal performance and extend the lifespan of your air purifier, it is crucial to address power supply issues promptly. By checking the power source and connection, troubleshooting power-related problems, and following the reset steps, you can ensure that your Homedics Air Purifier operates efficiently and effectively.
Troubleshooting Steps To Solve Homedics Air Purifier Blinking Red Light
Learn troubleshooting steps to eliminate the blinking red light issue on your Homedics Air Purifier. This guide will help you solve the problem and optimize the performance of your air purifier.
If you’re experiencing a blinking red light on your Homedics air purifier, it can indicate that there is an issue that needs attention. Don’t worry, in this section, we will provide you with step-by-step instructions to help you troubleshoot and resolve the blinking red light issue.
Follow these simple steps to get your air purifier back to optimal performance:
Step 1: Check The Filters
- Ensure that the filters are clean and properly inserted.
- Remove the filters and inspect them for any dust or debris buildup.
- If necessary, gently clean the filters using a soft brush or vacuum cleaner.
- Re-insert the filters carefully, making sure they are properly aligned.
Step 2: Power Cycle The Air Purifier
- Turn off the air purifier and unplug it from the power source.
- Wait for a few seconds before plugging it back in.
- Turn on the air purifier and observe if the blinking red light persists.
Step 3: Reset The Air Purifier
- Locate the reset button on the control panel or the back of the air purifier.
- Press and hold the reset button for about 5-10 seconds.
- Release the button and wait for a moment.
- Check if the blinking red light continues to appear.
Step 4: Check For Obstructions
- Inspect the air intake and outlet vents for any obstructions.
- Ensure that the vents are clear of dust, pet hair, or other debris that may restrict airflow.
- Clean the vents using a soft cloth or brush if needed.
Step 5: Resolve Sensor Issues
- A blinking red light can also indicate a sensor problem.
- Consult the user manual for instructions on how to recalibrate or troubleshoot the sensors.
- Follow the provided guidelines to resolve any sensor issues.
Step 6: Contact Customer Support
- If the blinking red light persists despite following the troubleshooting steps, it may require professional assistance.
- Reach out to the Homedics customer support team for further guidance and support.
- Provide them with all the necessary details about your air purifier and the issue you are facing.
By following these troubleshooting steps, you can effectively resolve the blinking red light issue on your Homedics air purifier. Remember to always refer to the user manual for specific instructions tailored to your model.
Check And Clean The Air Quality Sensor
To address the issue of a blinking red light on your Homedics air purifier, start by checking and cleaning the air quality sensor. This simple step can help improve the performance and effectiveness of your air purifier.
If you own a Homedics air purifier and notice a blinking red light, it is likely an indication that there is an issue with the air quality sensor. The air quality sensor is a critical component of the purifier that detects the level of pollutants in the air.
Regular maintenance and cleaning of the sensor are important to ensure its proper functioning. In this section, we will explore the location and cleaning procedure of the air quality sensor, discuss the importance of regular sensor maintenance, and provide tips to prevent sensor issues in the future.
Location And Cleaning Procedure Of The Air Quality Sensor
To effectively check and clean the air quality sensor in your Homedics air purifier, follow these steps:
- Locate the air quality sensor: The air quality sensor is typically located near the front panel of the air purifier. It may be marked with a “Sensor” or “Air Quality” label.
- Ensure the air purifier is turned off: Before proceeding, make sure to turn off the air purifier and unplug it from the power outlet for safety.
- Remove the front panel: Depending on the model of your Homedics air purifier, removing the front panel may involve unclipping or unscrewing certain parts. Refer to the user manual for specific instructions.
- Locate the air quality sensor within the purifier: Once the front panel is removed, you should be able to identify the air quality sensor. It is usually a small protruding component with electronic sensors.
- Clean the air quality sensor: Gently clean the air quality sensor using a soft, dry cloth. Do not use any liquids or cleaning agents as they may damage the sensor. Ensure that the sensor is free from dust, dirt, or any other obstructions that might interfere with its performance.
- Reassemble the air purifier: Once you have cleaned the air quality sensor, carefully reassemble the front panel of the air purifier as per the user manual instructions.
Importance Of Regular Sensor Maintenance
Regular maintenance of the air quality sensor is crucial to the proper functioning of your Homedics air purifier. Here’s why it’s important:
- Accurate air quality readings: A clean sensor ensures accurate detection of pollutants, allowing your air purifier to effectively eliminate them from the air.
- Enhanced performance: Properly maintained sensors contribute to the overall performance and efficiency of the air purifier. By regularly cleaning the sensor, you can ensure optimal functionality.
- Prolonged lifespan: Neglecting sensor maintenance can lead to premature sensor failure or reduced performance. By taking care of the sensor, you can extend the lifespan of your air purifier.
Tips To Prevent Sensor Issues In The Future
To prevent sensor issues and maintain the air quality sensor’s performance, consider the following tips:
- Regular cleaning: Make it a habit to clean the air quality sensor at least once a month, or as recommended by the manufacturer.
- Minimize dust and debris: Keep the surrounding area clean and minimize dust and debris accumulation near the air purifier. This helps prevent contaminants from reaching the sensor.
- Avoid placing objects near the sensor: Ensure there are no obstructions near the air quality sensor that could impede its function.
- Follow manufacturer guidelines: Always refer to the user manual and manufacturer’s guidelines for specific maintenance instructions and recommendations.
By following these tips and regularly checking and cleaning the air quality sensor, you can ensure optimal performance and longevity of your Homedics air purifier.
Replace Expired Filters
Replace your Homedics air purifier’s blinking red light by replacing the expired filters for cleaner and fresher air in your home. Keep your air purifier working efficiently and effectively.
Is the red light on your Homedics air purifier blinking? If so, it’s time to replace the expired filters. Regularly changing your air purifier filters not only ensures optimal performance but also helps maintain a healthy home environment. In this section, we will guide you through the process of removing and replacing your air purifier filters, discuss the different types of filters available, and provide tips for proper filter installation.
Instructions To Remove And Replace Air Purifier Filters
To replace your air purifier filters, follow these simple instructions:
- Turn off the air purifier: Make sure the unit is turned off and unplugged before attempting to change the filters. Safety first!
- Locate the filter compartment: Depending on your specific Homedics model, the filter compartment may be located at the back, front, or side of the unit. Refer to your air purifier’s user manual for guidance.
- Open the filter compartment: Gently remove the cover or open the designated area to access the filters. Some models may require you to press a button or twist a latch to unlock the compartment.
- Remove the expired filters: Take out the old filters carefully. Dispose of them properly according to your local waste disposal regulations. It’s crucial to handle used filters with care to prevent any potential contaminants from spreading.
- Clean the filter compartment: Use a soft cloth or brush to wipe away any dust or debris accumulated in the filter compartment. This step ensures the efficiency and longevity of your new filters.
- Install the new filters: Align the new filters properly in the designated slots. Make sure they fit snugly and securely to ensure effective filtration. Refer to your user manual for any specific filter installation instructions.
- Close the filter compartment: Once the new filters are in place, carefully close the filter compartment, ensuring that it locks securely. This step prevents any air bypassing the filters and ensures efficient purification.
- Plug in and turn on the air purifier: Connect your air purifier to the power source and switch it on. Check if the blinking red light has disappeared, indicating successful filter replacement.
Different Types Of Filters And Their Specific Replacement Methods
Homedics air purifiers may utilize different types of filters, each with its specific replacement method. Here are the common filter types and their replacement methods:
- Pre-Filter: The pre-filter is usually the first line of defense in trapping larger particles like dust, pet hair, and lint. It requires regular cleaning or replacement, depending on its condition. To clean a pre-filter, remove it from the unit and gently vacuum or wash it under running water. Let it dry thoroughly before reinstalling. If the pre-filter is damaged or beyond cleaning, replace it according to the manufacturer’s instructions.
- True HEPA Filter: HEPA filters are highly effective in capturing small allergens, pollen, mold spores, and other airborne particles. They generally need replacement every 6 to 12 months, depending on usage and air quality. Follow the same instructions mentioned earlier to remove and replace the true HEPA filter.
- Carbon Filter: Carbon filters excel at eliminating odors, smoke, and harmful chemical vapors. These filters typically last for 6 to 12 months but may require replacement sooner in areas with high pollutant levels or heavy smoke. Refer to your user manual for specific instructions on replacing the carbon filter.
Ensuring Proper Filter Installation For Optimal Performance
To guarantee optimal performance and effectiveness of your air purifier, follow these tips for proper filter installation:
- Ensure the filters fit snugly without any gaps or misalignment.
- Double-check that the filter compartment is securely closed to avoid air leakage.
- Regularly clean or replace the pre-filter to prevent debris buildup and maintain the efficiency of the other filters.
- Keep track of the filter replacement schedule and adhere to the manufacturer’s recommendations.
- Monitor the filter indicator lights or use the provided filter replacement reminders to stay up to date with the maintenance needs of your air purifier.
Remember, regular filter replacement ensures that your Homedics air purifier functions at its best, providing you with clean and healthy air to breathe. So, don’t ignore that blinking red light—replace those expired filters and enjoy the benefits of fresh, purified air in your home.
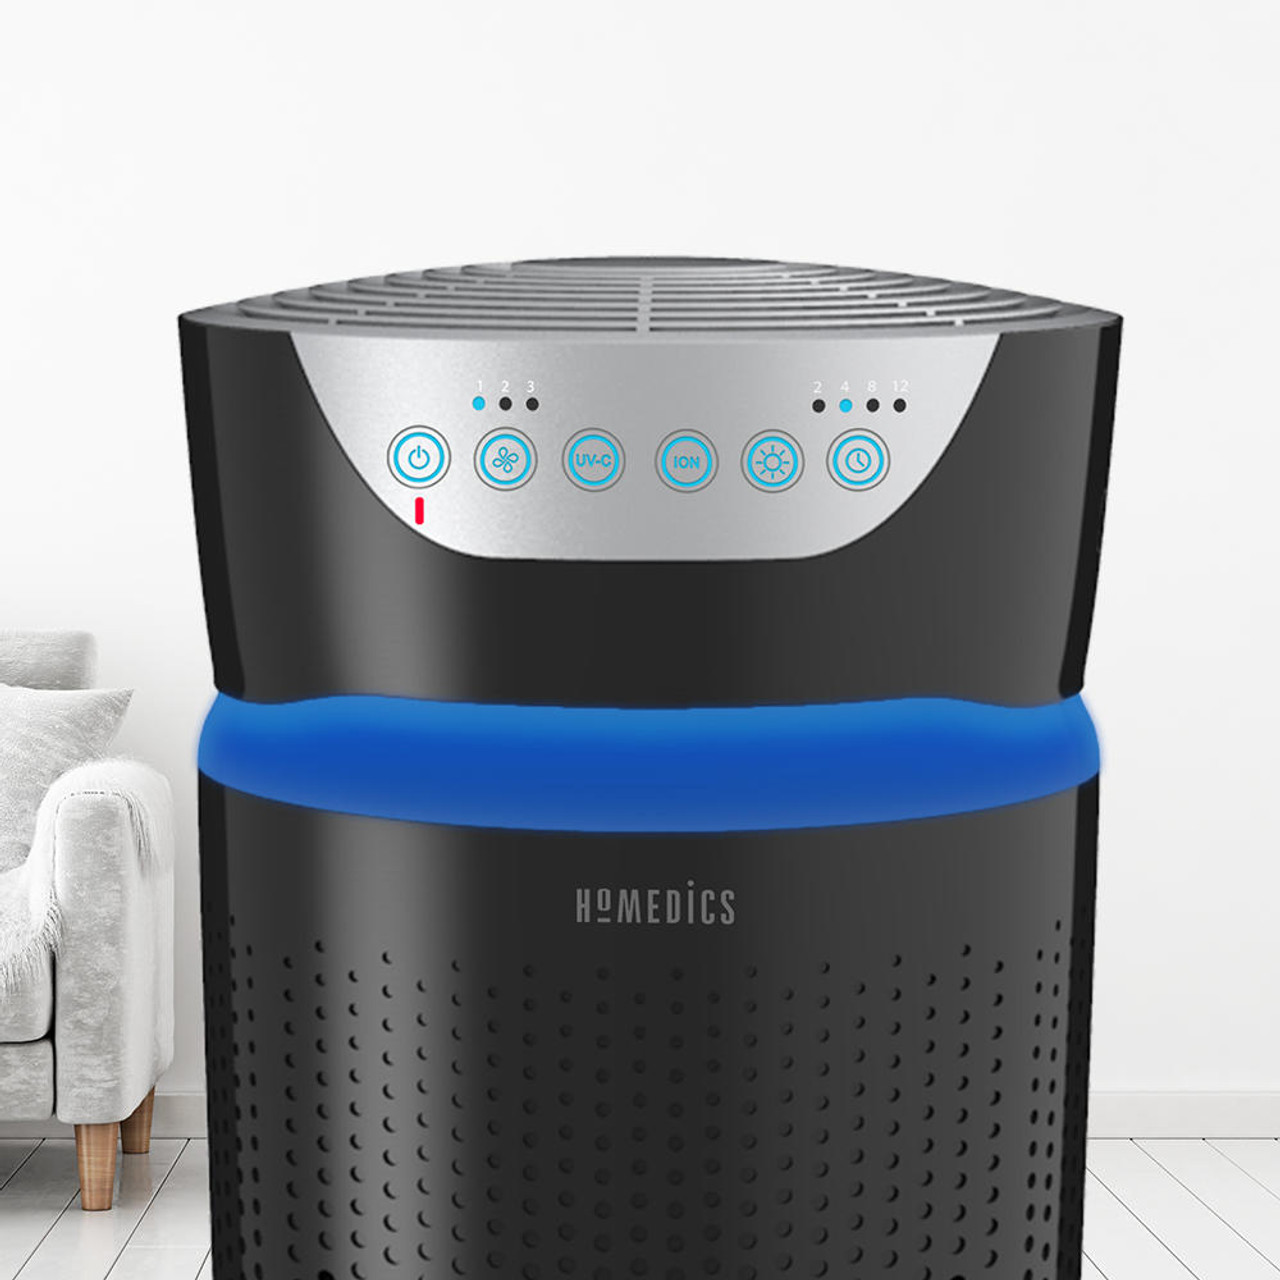
Credit: aircaring.com
Resetting The Air Purifier
To reset a Homedics Air Purifier when the LED light is blinking red, simply power off the device, unplug it from the outlet, wait for a few minutes, and then plug it back in. This will allow the air purifier to recalibrate and resume its normal functioning.
Step-By-Step Guide To Perform A Reset On Homedics Air Purifiers
If you’ve noticed your Homedics air purifier blinking a red light, it may be time for a reset. By following these simple steps, you can easily reset your air purifier and get it back to optimal performance.
- Unplug the air purifier from the power source and leave it unplugged for at least 5 minutes.
- While the air purifier is unplugged, remove the filter and check for any dirt or debris. Clean or replace the filter if necessary.
- Plug the air purifier back into the power source.
- Locate the reset button on the control panel of your Homedics air purifier.
- Press and hold the reset button for approximately 5 seconds. You may need a small tool, such as a paperclip or toothpick, to reach the reset button.
- Once the reset is complete, the blinking red light should stop and the air purifier will restart with the default settings.
Performing a reset on your Homedics air purifier can help restore its filter life and overall performance. The reset clears any temporary glitches or errors that may have occurred, ensuring that your air purifier functions at its best.
Effect Of A Reset On Filter Life And Performance
Resetting your Homedics air purifier can have a positive impact on its filter life and performance. Here’s how a reset can benefit your air purifier:
- Resetting the air purifier helps clear any accumulated dust or debris in the filter, allowing it to capture pollutants more effectively.
- By resetting the air purifier, you are essentially giving it a fresh start, ensuring that it operates at its optimum performance level.
- The reset also helps recalibrate the internal systems of the air purifier, ensuring accurate monitoring of air quality and efficient operation.
Overall, performing a reset on your Homedics air purifier enhances its longevity, maintains the effectiveness of the filter, and ensures that it continues to provide clean and fresh air for your space.
Additional Troubleshooting Steps After The Reset If Necessary
If resetting your Homedics air purifier didn’t resolve the issue completely, here are some additional troubleshooting steps you can try:
- Check the power source and ensure that the air purifier is securely plugged in.
- Inspect the filter for any signs of damage or clogging. Replace the filter if necessary.
- Clean the air intake vents and ensure they are not obstructed by dust or debris.
- Ensure that the air purifier is placed in an appropriate location, away from walls or other objects that may hinder airflow.
- If all else fails, consult the user manual or contact Homedics customer support for further assistance.
Remember, troubleshooting steps may vary depending on the specific model of your Homedics air purifier. Always refer to the user manual for detailed instructions and guidance.
By following these simple steps and troubleshooting tips, you can easily reset your Homedics air purifier and resolve any blinking red light issues. Enjoy clean and fresh air in your space with a properly functioning air purifier.
Proactive Measures To Avoid Homedics Air Purifier Blinking Red Light
To avoid the blinking red light issue on your Homedics Air Purifier, take proactive measures such as regularly cleaning the filters, ensuring proper placement of the unit, and avoiding overload situations by running the purifier within its recommended capacity. Proper maintenance and adherence to manufacturer instructions can help prevent this issue.
Are you tired of seeing that annoying blinking red light on your Homedics air purifier? Don’t worry, we’ve got you covered. By taking some simple preventive steps, you can easily maintain an optimal functioning air purifier and say goodbye to that pesky blinking light.
Read on to discover how you can keep your Homedics air purifier running smoothly and efficiently.
Preventive Steps To Maintain An Optimal Functioning Air Purifier:
- Regular Filter Cleaning: Dust and debris can accumulate on the air purifier’s filter over time, leading to decreased performance and potentially triggering the blinking red light. Ensure you clean or replace the filter according to the manufacturer’s instructions to keep your air purifier functioning optimally.
- Monitor Air Quality Indicators: Many Homedics air purifiers come with built-in air quality indicators that can help you identify whether the unit is working correctly. Keep an eye on these indicators to ensure the air is being purified effectively and take appropriate steps if you notice any changes or abnormalities.
- Adequate Placement: Proper placement of your air purifier plays a crucial role in its efficiency. Make sure you position it in a central location within the room, away from obstructions such as curtains or furniture. This allows for better air circulation and optimal performance.
- Keep the Air Purifier Switched On: It’s tempting to turn off the air purifier when leaving the room or during certain times of the day. However, keeping it powered on consistently enables continuous purification and prevents the accumulation of pollutants that could lead to the blinking red light.
- Regular Dusting: Dust can accumulate on the air purifier’s exterior, affecting its performance and triggering the blinking red light. Make a habit of dusting the unit regularly to keep it free from debris and ensure optimal functioning.
- Avoid Overloading the Purifier: Homedics air purifiers come with specific coverage areas. Overloading the air purifier by placing it in a larger room than recommended can strain its performance and lead to the blinking red light. Ensure you adhere to the recommended coverage area for efficient operation.
- Check for Obstructions: Occasionally, obstructions can hinder the airflow in your air purifier, reducing its effectiveness and causing the blinking red light. Check the unit for any obstructions such as furniture, curtains, or other objects that may impede the airflow and promptly remove them.
- Keep the Room Clean: Maintaining a clean environment not only improves the air quality in your room but also reduces the strain on your air purifier. Regularly dust, vacuum, and tidy up the room to minimize the presence of particles that may overload the purifier and trigger the blinking red light.
- Mindful Placement of Air Fresheners: While air fresheners can help create a pleasant smell, they may contain chemicals that can interfere with the air purifier’s performance. Be mindful of where you place air fresheners and avoid positioning them too close to the air intake of your Homedics air purifier.
- Regular Maintenance: Follow the manufacturer’s recommended maintenance schedule for your specific model. Regular maintenance, such as checking for loose parts, inspecting electrical connections, and cleaning the unit thoroughly, can keep your air purifier functioning optimally and prevent the blinking red light.
By implementing these proactive measures, you can maintain an optimal functioning Homedics air purifier and prevent the annoying blinking red light from appearing. Remember, your air purifier needs regular care and attention to ensure it performs at its best and keeps the air in your home clean and fresh.
Regular Filter Maintenance
Ensure the optimal functioning of your Homedics Air Purifier by regularly maintaining the filters. If you notice a red blinking light on your device, it may indicate that the filters need to be cleaned or replaced to maintain clean and fresh air in your home.
Importance Of Cleaning Or Replacing Filters On A Schedule:
Regular filter maintenance is essential for the optimal performance of your Homedics air purifier. Over time, the filters accumulate dirt, dust, and other airborne particles that hinder their ability to effectively clean the air in your home. By cleaning or replacing the filters on a schedule, you can ensure that your air purifier continues to function efficiently and provide you with clean, breathable air.
Here are a few reasons why filter maintenance is crucial:
- Improved Air Quality: Clean filters trap and remove airborne contaminants more effectively, improving the overall air quality in your home. By removing allergens, pollutants, and odors from the air, you can create a healthier living environment for you and your family.
- Optimized Performance: When the filters are clogged with debris, the air purifier’s air flow becomes restricted, and it has to work harder to circulate clean air. Regular filter maintenance ensures unobstructed air flow, allowing the air purifier to operate at its optimal performance level.
- Extended Lifespan of the Air Purifier: By taking care of the filters, you can extend the lifespan of your Homedics air purifier. When the filters are dirty and clogged, the motor and other internal components of the air purifier may experience strain, potentially leading to premature wear and tear. Proper maintenance can help prevent unnecessary damage and prolong the life of your device.
Recommended Cleaning Methods For Different Types Of Filters:
Different air purifiers come with various types of filters, and each requires specific cleaning methods. Here are the recommended cleaning methods based on the most common types of filters used in Homedics air purifiers:
**Permanent Pre-filter:**
- Regularly vacuum or brush the pre-filter to remove large particles and dust buildup.
- Rinse the pre-filter under running water to remove stubborn dirt.
- Let the pre-filter dry completely before reinstalling it.
**HEPA Filter:**
- Check the manufacturer’s instructions for your specific model to determine if the HEPA filter is washable or replaceable.
- If washable, gently vacuum the filter to remove loose debris.
- Rinse the filter under cool water and allow it to air dry completely.
- If replaceable, follow the recommended replacement schedule provided by the manufacturer.
**Carbon Filter:**
- Carbon filters cannot be washed or cleaned and require replacement. Check the manufacturer’s instructions for the recommended replacement schedule.
Tips For Extending The Lifespan Of Air Purifier Filters:
In addition to regular cleaning and maintenance, there are a few simple steps you can take to help extend the lifespan of your air purifier filters:
- Keep Doors and Windows Closed: Minimize the amount of outdoor pollutants that enter your home by keeping doors and windows closed, especially during times of high pollution or allergen counts.
- Vacuum and Dust Regularly: Regularly vacuum and dust your home to reduce the amount of dust and debris that can accumulate on the filters.
- Avoid Smoking Indoors: Smoke can quickly clog air purifier filters, so it’s best to avoid smoking indoors altogether.
- Avoid Using Harsh Cleaning Chemicals: When cleaning the air purifier or its filters, avoid using harsh chemicals that could damage the filter material. Stick to gentle cleaners or mild soap and water.
- Follow Manufacturer’s Instructions: Always follow the manufacturer’s instructions for filter maintenance and replacement. They provide specific guidelines for your air purifier model and ensure optimal performance.
Taking the time to clean or replace your air purifier filters on schedule and following these tips will help keep your Homedics air purifier running smoothly and effectively, ensuring that you and your family breathe clean, fresh air.
Proper Placement And Usage
The blinking red light on your Homedics Air Purifier indicates proper placement and usage, ensuring effective air purification in your home.
Best Practices For Placing The Air Purifier In The Room
Proper placement of your Homedics Air Purifier is crucial for its optimal performance. Follow these best practices to ensure that your air purifier is placed in the right location:
- Choose a central location: Position the air purifier in the middle of the room to achieve maximum coverage and effectiveness. This way, the clean air will be distributed evenly, making it easier for the purifier to remove airborne particles throughout the entire space.
- Keep a distance from walls and furniture: Leave some space between the air purifier and walls or furniture to allow proper airflow. Placing the purifier too close to obstructions can hinder its effectiveness and lead to inefficient air purification.
- Avoid direct sunlight: Direct exposure to sunlight can cause the air purifier to heat up, potentially affecting its functionality. Place the purifier away from windows or areas with direct sunlight to prevent any unnecessary strain on the device.
- Do not place it on the floor: While it may be tempting to position the air purifier on the floor, it’s not the most efficient placement. Airborne contaminants tend to settle closer to the ground, so positioning the purifier at a higher level, such as on a table or shelf, helps it capture those contaminants more effectively.
- Consider room size: If you have a larger room, you may need to use multiple air purifiers or a model with higher coverage to ensure the air is thoroughly purified. Consult the manufacturer’s guidelines for recommended room sizes and purifier capacities to choose the right option for your space.
Avoiding Obstructions To Ensure Proper Airflow
To ensure optimal performance and efficiency of your Homedics Air Purifier, it is essential to avoid obstructions that can impede proper airflow. Here are some key points to keep in mind:
- Do not block the intake or exhaust vents: The air purifier pulls in air from the room through its intake vents and releases purified air through the exhaust vents. Make sure that no objects, such as curtains, furniture, or plants, are blocking these vents. Clearing any obstructions allows for unrestricted airflow and better air circulation.
- Maintain sufficient distance from walls: It is advisable to place the air purifier at least 6-12 inches away from walls. This distance ensures that airflow is not obstructed by the wall surface, enabling the purifier to effectively capture and filter airborne particles.
- Avoid placing it near other electronic devices: Electronics generate heat, and positioning the air purifier near them can disrupt its airflow and potentially affect its performance. Keep the purifier away from televisions, computers, or other heat-generating devices to maintain proper ventilation.
- Regularly clean the filters: Clogged filters can hinder the airflow and reduce the efficiency of the air purifier. Follow the manufacturer’s instructions for cleaning or replacing the filters to ensure optimum performance.
Correct Usage Guidelines For Optimal Air Purification
To enjoy the full benefits of your Homedics Air Purifier and ensure optimal air purification, follow these correct usage guidelines:
- Keep the unit powered on: For continuous air purification, it is recommended to keep the air purifier powered on at all times. Running the purifier consistently helps maintain clean air in the room and ensures that the purifying process is ongoing.
- Adjust the fan speed: Most air purifiers offer multiple fan speed settings. When pollution levels are high or if you desire faster air purification, set the fan speed to a higher setting. For quieter operation, choose a lower fan speed. Adjust the fan speed according to your preference and the air quality in the room.
- Regularly replace filters: Air purifiers rely on filters to remove pollutants from the air. Over time, filters can become clogged and less effective. Refer to the manufacturer’s instructions for the recommended filter replacement schedule and make sure to follow it to maintain optimal air purification.
- Monitor filter indicators: Some air purifiers feature filter replacement indicators that notify you when it’s time to change the filters. Pay attention to these indicators and promptly replace the filters as indicated to ensure the best performance from your air purifier.
- Clean the exterior regularly: Dust and dirt can accumulate on the exterior of the air purifier, potentially affecting its appearance and functionality. Clean the surface of the unit periodically using a soft, damp cloth to maintain its performance and keep it looking its best.
Routine Cleaning And Maintenance
Keep your Homedics Air Purifier running smoothly with routine cleaning and maintenance. If you notice a blinking red light, it’s time to take action and ensure your air purifier is working at its best.
Cleaning The Exterior And Interior Components Of The Air Purifier:
Maintenance plays a crucial role in ensuring the optimal performance of your Homedics Air Purifier. Routine cleaning of both the exterior and interior components helps maintain the efficiency and longevity of the device. Here are some steps to clean your air purifier effectively:
- Exterior cleaning:
- Gently wipe the exterior surfaces of the air purifier with a soft, damp cloth to remove dust and dirt. Avoid using harsh chemicals or abrasive materials that could damage the device.
- Pay special attention to the control panel and vents, as they tend to accumulate more dirt. Clean them thoroughly using a mild, non-abrasive cleaner and a soft cloth.
- Ensure that the air purifier is unplugged from the power source before attempting any cleaning.
- Interior cleaning:
- Open the air purifier according to the manufacturer’s instructions, providing access to the filters and internal components.
- Remove and replace or clean the filters as recommended by the manufacturer. Consult the user manual for specific instructions related to your model.
- Clean the interior of the air purifier using a soft brush or a vacuum cleaner with a brush attachment. Be gentle to avoid damaging any delicate components.
Proper maintenance goes a long way in enhancing the effectiveness and lifespan of your Homedics Air Purifier. Regularly cleaning the exterior and interior components ensures that the air purifier functions optimally, providing clean and fresh air to your surroundings.
Recommended Frequency Of Maintenance Tasks:
To maintain the performance of your Homedics Air Purifier, it is essential to follow a regular maintenance schedule. Here are the recommended frequencies for various maintenance tasks:
- Exterior cleaning:
- Clean the exterior surfaces of the air purifier every month to prevent dust and dirt buildup.
- Filter replacement or cleaning:
- Check the manufacturer’s instructions for the recommended frequency of filter replacement or cleaning. This usually ranges from every 3 to 12 months, depending on the air purifier model and usage.
By adhering to these maintenance guidelines, you can ensure that your air purifier operates efficiently and continues to provide clean and purified air to your environment.
Troubleshooting Common Performance Issues And When To Seek Professional Help:
Even with regular maintenance, you may encounter performance issues with your Homedics Air Purifier. Here are some common problems you may face and steps to troubleshoot them:
- Blinking red light:
- If the air purifier’s red light is blinking, it usually indicates that the filters need cleaning or replacement. Refer to the user manual for instructions on how to reset the filter change indicator.
- Clean or replace the filters as recommended by the manufacturer.
- Inadequate air purification:
- Ensure that the air purifier is placed in an appropriate location with unobstructed airflow.
- Check if the filters are clean and properly installed.
- Adjust the fan speed according to the room size and air quality requirements.
If you have tried troubleshooting and the issue persists, it may be time to seek professional help. Contact the Homedics customer service or a qualified technician who can assist you in resolving any complex performance problems and ensure the proper functioning of your air purifier.
Regular cleaning and maintenance are essential for the optimal performance of your Homedics Air Purifier. By following the recommended cleaning frequencies, troubleshooting common issues, and knowing when to seek professional help, you can enjoy clean and purified air in your living space for years to come.
Frequently Asked Questions On Homedics Air Purifier Blinking Red
Why Is Homedics Air Purifier Blinking Red?
Homedics air purifier is blinking red to indicate a malfunction or filter replacement is needed.
Why Is My Air Purifier Light Flashing?
The flashing light on your air purifier is indicating a problem or a specific function.
How Do I Get Rid Of The Red Light On My Air Purifier?
To get rid of the red light on your air purifier: 1. Check if the filter needs to be replaced. 2. Clean the sensor or any dust buildup on the unit. 3. Make sure the air purifier is placed in an open space with no obstructions.
4. Ensure the power source is stable and properly connected.
How Do I Reset My Homedics Filter Light?
To reset the Homedics filter light: 1. Turn off and unplug the device. 2. Remove the filter and clean or replace it as needed. 3. Plug the device back in and turn it on. 4. Press and hold the filter reset button until the light resets.
Conclusion
The Homedics Air Purifier Blinking Red is a reliable and effective solution for improving indoor air quality. With its advanced technology and user-friendly features, this air purifier ensures a cleaner and healthier living environment. The blinking red light indicates the need for maintenance or filter replacement, making it easy to keep the purifier running at its optimal efficiency.
Additionally, the compact design and quiet operation make it suitable for any room in your home or office. By removing airborne particles such as dust, pet dander, and allergens, this air purifier helps to reduce respiratory issues and promote better overall health.
Invest in the Homedics Air Purifier Blinking Red to purify the air you breathe and enjoy a fresher and more comfortable living space. Say goodbye to indoor pollutants and hello to a healthier living environment.