
Contents
- Benefits of Having an Appliance Garage in Your Kitchen
- Choosing the Right Location for Your DIY Appliance Garage
- Materials and Tools Needed for DIY Appliance Garage
- Step-by-step Guide to Building Your Appliance Garage
- Choosing the Right Appliance Garage Design
- Tips for Optimizing Storage Space in Your Appliance Garage
- Safety Considerations for Your DIY Appliance Garage
- Incorporating Style and Aesthetics into Your Appliance Garage
- Maintenance and Cleaning Tips for Your Appliance Garage
- Inspiring Examples of DIY Appliance Garages
Looking for a practical yet stylish storage solution for your kitchen? Look no further than the DIY Appliance Garage: Creative Storage Solutions for Your Kitchen. This innovative product allows you to neatly store and hide your small appliances, keeping your countertops clutter-free and your kitchen looking sleek. With its easy-to-assemble design, the DIY Appliance Garage offers a customizable solution that fits seamlessly into any kitchen decor. Say goodbye to countertop chaos and hello to a more organized kitchen with this must-have storage solution.

Benefits of Having an Appliance Garage in Your Kitchen
Conceals countertop clutter
Having an appliance garage in your kitchen provides a convenient solution for concealing countertop clutter. Countertops can easily become filled with various small appliances such as toasters, blenders, and coffee makers, making the space look messy and disorganized. By incorporating an appliance garage into your kitchen design, you can neatly store these appliances out of sight, creating a clean and visually appealing kitchen.
Increases usable countertop space
One of the major benefits of having an appliance garage in your kitchen is that it allows you to reclaim valuable countertop space. With appliances stored out of sight, you can now have more room to prepare food, chop vegetables, or simply have a clear surface for other tasks. This increased countertop space not only enhances the functionality of your kitchen but also gives it a more spacious and open feel.
Protects appliances from damage
Appliances are often subjected to damage in a busy kitchen environment. They can be bumped, scratched, or even knocked off the countertop accidentally. By keeping your appliances safely stored within an appliance garage, you protect them from such potential damage. The enclosed space ensures that your appliances remain secure and are not vulnerable to accidental bumps or falls, significantly extending their lifespan.
Provides easy access to frequently used appliances
While an appliance garage hides your appliances away, it does not make them inaccessible. In fact, it provides easy and convenient access to frequently used appliances. With just a simple slide or roll of the garage door or lid, you can quickly retrieve your toaster or blender without the hassle of taking it out from a cabinet or hunting through cluttered countertops. This accessibility saves you time and effort, especially during busy mornings or when you’re in the midst of preparing a meal.
Choosing the Right Location for Your DIY Appliance Garage
Consider available space
Before embarking on building your DIY appliance garage, it is important to assess the available space in your kitchen. Take measurements of the area where you intend to install the appliance garage to ensure that it will fit properly. Consider the height, width, and depth of the space, and take note of any obstructions or nearby fixtures that may affect its placement. This preliminary step will help you determine the suitable size and design for your appliance garage.
Evaluate proximity to electrical outlets
Since most appliances require electrical power, it is essential to choose a location for your appliance garage that is in close proximity to electrical outlets. This will ensure that you can easily connect your appliances without the need for long extension cords that may pose safety hazards. Make sure there are sufficient outlets nearby to accommodate the appliances you plan to store in the garage.
Ensure convenient accessibility
In addition to proximity to electrical outlets, it is crucial to consider the convenience of accessing your appliance garage. Choose a location that is easily reachable without hindering your ability to work efficiently in the kitchen. Ideally, the appliance garage should be situated in a central area where you can easily retrieve and return your appliances without disrupting your workflow. Consider the flow of your kitchen and the placement of other important elements, such as the sink, stove, and refrigerator, when deciding on the right location.
Account for ventilation requirements
Certain appliances, such as coffee makers or toasters, may emit heat or require ventilation while in use. When choosing the location for your appliance garage, it is important to account for these ventilation requirements. Ensure that there is enough space around the appliances to allow for proper air circulation and prevent overheating. If your chosen location does not provide adequate ventilation, you may need to incorporate venting systems or choose alternative locations for appliances that require it.

Materials and Tools Needed for DIY Appliance Garage
Measurements and dimensions
Before you gather any materials or tools, accurate measurements and dimensions are essential. Use a tape measure to determine the height, width, and depth of the space where you plan to install the appliance garage. These measurements will guide you in selecting the appropriate materials and components needed to construct the garage.
Wood or alternative materials
The main component of your appliance garage will typically be constructed from wood or alternative materials such as MDF (medium-density fiberboard) or plywood. Choose a sturdy and durable material that is suitable for your desired design and budget. Keep in mind that the material you choose will impact the overall look and feel of your appliance garage, so select one that complements your kitchen’s aesthetics.
Screws, nails, or adhesives
To assemble and secure the various components of your appliance garage, you will need screws, nails, or adhesives, depending on your chosen materials. Select appropriate fasteners that are compatible with your chosen materials and ensure they provide a strong and sturdy connection.
Hinges and handles
Hinges and handles are essential for the functionality of your appliance garage. Hinges will allow the garage door or lid to open and close smoothly, while handles provide a convenient grip for accessing the appliances. Choose hinges and handles that are durable, easy to install, and complement the overall design of your appliance garage.
Finishing materials (paint, stain, etc.)
To add the final touch of style and protection to your appliance garage, you will need finishing materials such as paint, stain, or varnish. Consider the color scheme and aesthetic of your kitchen when selecting these materials. Paint or stain can help you achieve a cohesive and harmonious look, blending your appliance garage seamlessly with the rest of your kitchen’s design.
Drill, saw, and other necessary tools
In addition to the materials mentioned above, you will need various tools to assemble and construct your appliance garage. These tools may include a drill, saw, measuring tape, level, screwdriver, sandpaper, and other items specific to your chosen design. Make sure you have these tools readily available before starting your DIY project.
Step-by-step Guide to Building Your Appliance Garage
Design and plan your garage
Before starting the construction process, spend time designing and planning your appliance garage. Consider the dimensions of the space, the number and size of appliances you intend to store, and any specific features or compartments you want to include. Create a detailed blueprint or sketch to serve as a guide throughout the construction process.
Gather necessary materials and tools
Once you have a clear design and plan, gather all the necessary materials and tools. Refer to your blueprint to determine the quantities and sizes of wood, fasteners, hinges, handles, and finishing materials you will need. Organize your tools and ensure that everything is easily accessible before you begin construction.
Measure, cut, and assemble the frame
Begin by measuring and cutting the wood or alternative materials according to the dimensions of your blueprint. Use a saw or other appropriate cutting tools to achieve accurate and clean cuts. Assemble the frame of your appliance garage, ensuring that the pieces fit together securely. Use screws, nails, or adhesives to fasten the components, and check for stability and squareness.
Attach hinges and handles
Next, attach the hinges and handles to your appliance garage. Place the hinges on the door or lid of the garage at the appropriate positions, ensuring they align properly with the frame. Secure the hinges with screws, making sure they allow for smooth opening and closing of the garage door or lid. Attach the handles in a convenient and ergonomically comfortable location for easy access.
Install ventilation if required
If your appliances require ventilation, this is the time to incorporate it into your appliance garage design. Cut out appropriate openings or install venting systems to ensure proper airflow and prevent overheating. Pay attention to the specific requirements of each appliance and consult manufacturer guidelines or professional advice if needed.
Apply finishing touches and paint/stain
Once the construction is complete, it’s time to apply finishing touches to your appliance garage. Sand any rough edges or surfaces to achieve a smooth finish. If desired, apply paint, stain, or varnish to enhance the appearance and protect the wood or alternative material. Follow the manufacturer’s instructions regarding application techniques, drying times, and any necessary protective measures.
Mount the appliance garage in the chosen location
After the finishing materials have dried completely, it’s time to mount your appliance garage in the chosen location. Depending on your design, this may involve securing the garage to the wall, cabinet, or countertop using screws, brackets, or other appropriate mounting hardware. Ensure that the appliance garage is securely fastened and can bear the weight of the appliances and the usage it will experience.

Choosing the Right Appliance Garage Design
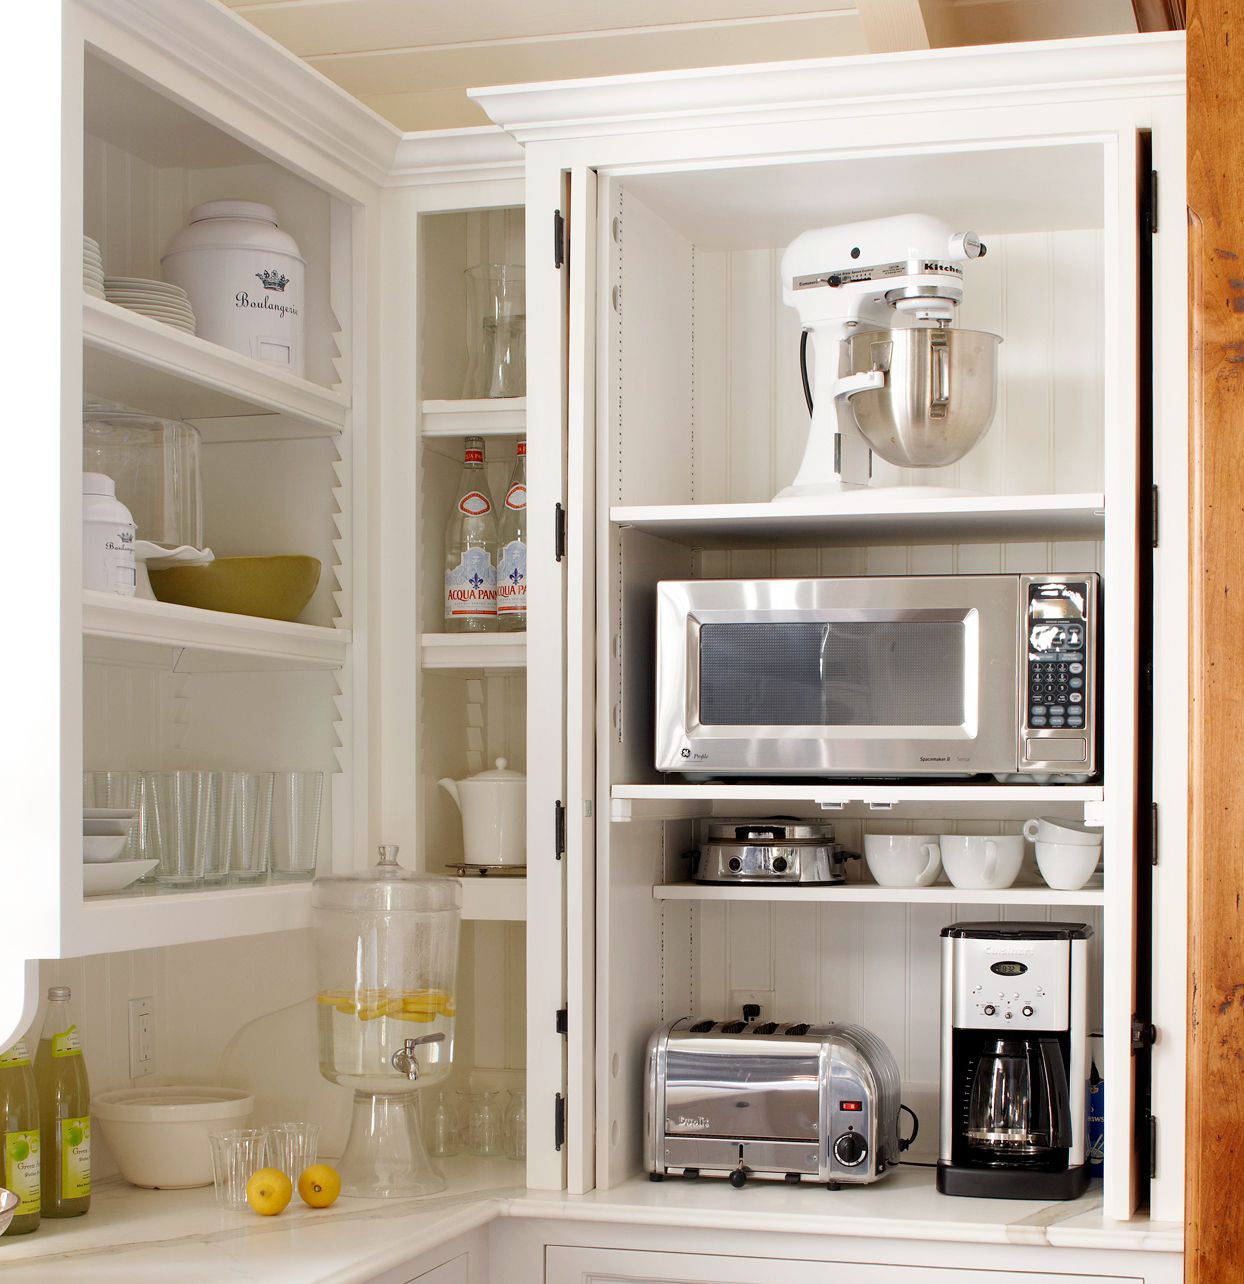
Traditional cabinet-style garage
One popular option for an appliance garage design is the traditional cabinet-style garage. This design features a garage door that swings open, revealing the stored appliances behind closed doors. It can blend seamlessly with the rest of your kitchen cabinetry, providing a cohesive and uniform look. Choose materials and finishes that match your existing cabinetry for a cohesive and aesthetically pleasing appearance.
Roll-up or slide-away garage
For a more modern and sleek look, consider a roll-up or slide-away appliance garage design. These designs feature a garage door that rolls up or slides to the side, allowing for effortless access to the stored appliances. These types of garages are especially popular in contemporary kitchens, as they provide a clean and minimalistic appearance when closed, and a convenient and functional space when open.
Pop-up garage
A pop-up appliance garage is a unique and innovative design that adds an element of surprise to your kitchen. This design features a hidden compartment that pops up from the countertop with the press of a button or a touch sensor, revealing the stored appliances. This design is particularly useful in small kitchens where space is limited, as it allows for seamless integration of appliances without taking up valuable countertop space.
Custom-made garage for specific appliances
If you have specific appliances that require special storage considerations, a custom-made appliance garage may be the ideal design for you. Custom-made garages can be tailored to your precise requirements, ensuring that your appliances fit perfectly and are easily accessible. Whether you have unique dimensions or specific needs for ventilation or electrical access, a custom-made appliance garage can accommodate your specific requirements.
Tips for Optimizing Storage Space in Your Appliance Garage
Utilize adjustable shelving
To maximize storage space in your appliance garage, consider incorporating adjustable shelving. Adjustable shelves allow you to customize the layout and accommodate appliances of different sizes. This flexibility ensures that you can efficiently use the available space and avoid wasted or unused areas within the garage.
Incorporate vertical storage options
Another effective way to optimize storage space in your appliance garage is to make use of vertical storage options. Install hooks, racks, or compartments on the inner walls of the garage to hang or store smaller items such as measuring cups, utensils, or oven mitts. This vertical storage solution frees up valuable shelf or countertop space while keeping these items easily accessible and organized.
Use hooks and magnetic strips for smaller items
For smaller items that tend to get lost or cluttered, such as spatulas, whiskers, or bottle openers, use hooks or magnetic strips. Attach hooks to the inner walls of your appliance garage to hang these utensils, making them easily visible and within reach. Magnetic strips can be mounted on the inner surface of the garage door, providing a convenient and space-saving solution to store metal objects like knives or measuring spoons.
Consider adding built-in power outlets
To further optimize the functionality of your appliance garage, consider adding built-in power outlets. This allows you to connect your appliances directly within the garage, eliminating the need for long cords or inconveniently placed outlets. Ensure that any electrical work is done by a licensed professional to guarantee safety and compliance with local electrical codes.
Label and organize items for easy retrieval
To maintain a well-organized appliance garage, it is helpful to label and categorize the items you store. Use labels or tags to identify the contents of each shelf or compartment, making it easier to locate specific appliances or utensils. Group similar items together, such as coffee-related appliances or baking tools, to streamline retrieval and ensure efficient use of the available space.

Safety Considerations for Your DIY Appliance Garage
Ensure proper ventilation
Proper ventilation is crucial for the safe operation of appliances stored in your appliance garage. Be mindful of any specific ventilation requirements for each appliance and ensure that the garage allows for adequate airflow. Insufficient ventilation can lead to overheating, potential damage to appliances, and even fire hazards. Consult manufacturer guidelines or seek professional advice if you have any concerns about ventilation requirements.
Securely fasten the garage to prevent accidents
Safety should always be a top priority when it comes to DIY projects, and an appliance garage is no exception. Properly secure the garage in its chosen location to prevent accidents or injuries. Ensure that it is firmly attached to the wall, cabinet, or countertop using appropriate mounting hardware or brackets. This will ensure stability and prevent it from tipping or falling over when opening or closing the door.
Use childproofing measures if necessary
If you have young children in your household, it is important to consider childproofing your appliance garage to prevent accidents. Install childproof locks or latches on the garage door or lid to restrict access and keep children from accidentally opening it and potentially getting injured. Additionally, consider storing any hazardous materials or appliances out of reach or in locked cabinets within the appliance garage.
Keep flammable materials away from heat sources
When storing appliances that emit heat or have hot surfaces, such as toasters or coffee makers, make sure to keep flammable materials away from these heat sources. Avoid storing items such as paper towels, oven mitts, or fabric near or on top of these appliances to minimize the risk of accidental fires. Maintain a safe distance and ensure adequate clearance around heat-emitting appliances.
Incorporating Style and Aesthetics into Your Appliance Garage
Choose complementary colors and finishes
When designing your appliance garage, consider choosing complementary colors and finishes that blend with the overall aesthetic of your kitchen. Match the paint or stain of the garage to your existing cabinetry or choose a contrasting color to create a focal point. Consider the color palette and materials in your kitchen to ensure a cohesive and visually pleasing integration of the appliance garage within the space.
Consider decorative hardware options
To add a touch of style and personality to your appliance garage, consider selecting decorative hardware options. Choose handles, knobs, or pulls that showcase your personal taste and complement the overall design of your kitchen. From sleek and modern to vintage and ornate, a wide range of decorative hardware options is available to enhance the appearance of your appliance garage.
Integrate the design with your kitchen’s overall theme
Your appliance garage should seamlessly blend with the overall theme and style of your kitchen. Whether your kitchen features a contemporary, rustic, or traditional design, ensure that the design of your appliance garage aligns with the existing elements. Harmonize colors, materials, and finishes to create a cohesive and visually appealing kitchen space.
Add personal touches and customization
Your appliance garage is an opportunity to showcase your personal style and creativity. Consider adding personal touches or customizing the design to make it uniquely yours. You can incorporate decorative accents, such as etched glass panels, custom carvings, or personalized engravings, to give your appliance garage a distinctive and personalized touch.

Maintenance and Cleaning Tips for Your Appliance Garage
Regularly wipe down the interior and exterior
To keep your appliance garage clean and well-maintained, it is important to regularly wipe down the interior and exterior surfaces. Use a damp cloth or sponge to remove any dust, dirt, or spills that may accumulate over time. Regular cleaning helps prevent the buildup of grime and ensures that your appliances remain in good condition.
Clean and lubricate hinges and moving parts
Pay attention to the hinges and other moving parts of your appliance garage. Over time, they may accumulate dirt or debris, causing them to operate less smoothly. Clean the hinges and moving parts regularly and lubricate them with appropriate lubricants to maintain their functionality. This will ensure that your appliance garage continues to open and close effortlessly.
Check for any signs of wear or damage
Periodically inspect your appliance garage for any signs of wear, damage, or deterioration. Check for loose screws, hinges, or handles, and tighten them if necessary. Examine the wood or alternative material for any cracks, splits, or signs of warping. Promptly address any issues to prevent further damage and maintain the integrity of your appliance garage.
Remove any food debris or spills promptly
Accidental spills or food debris can make their way into the appliance garage, potentially causing stains, odors, or attracting pests. To prevent this, promptly clean up any spills or food debris that may occur. Use a mild detergent or cleaning solution to remove any stains or odors and ensure that the interior of your appliance garage remains clean and fresh.
Inspiring Examples of DIY Appliance Garages
Sleek and modern minimalist design
For those who prefer a clean and contemporary look, a sleek and modern minimalist design for an appliance garage may be the perfect choice. This design often features clean lines, minimal embellishments, and a focus on functionality. Incorporate contrasting materials, such as metal accents or glass panels, to add visual interest while maintaining a streamlined and uncluttered appearance.
Rustic and farmhouse-inspired garage
If you prefer a cozy and inviting atmosphere in your kitchen, consider a rustic or farmhouse-inspired appliance garage design. Opt for natural materials such as weathered wood or reclaimed lumber to create a charming and rustic look. Incorporate vintage-inspired hardware, such as wrought iron handles or decorative hinges, to enhance the farmhouse aesthetic.
Compact and space-saving solutions
In smaller kitchens or kitchenettes, space can be a precious commodity. Compact and space-saving appliance garage designs are perfect in such scenarios. These designs utilize innovative storage solutions such as pull-out drawers or sliding shelves to maximize storage capacity without sacrificing valuable countertop or cabinet space. Consider incorporating these clever designs to make the most out of limited kitchen space.
Appliance garages in large chef’s kitchens
In larger chef’s kitchens that cater to extensive culinary needs, appliance garages can be a crucial element in maintaining an organized and efficient workspace. These kitchens often feature custom-made appliance garages that can accommodate a variety of appliances, from mixers and blenders to specialty tools and gadgets. Consider incorporating dedicated compartments, adjustable shelving, or even multiple appliance garages to meet the demands of your chef-inspired kitchen.
In conclusion, a DIY appliance garage offers numerous benefits for your kitchen, including concealing countertop clutter, increasing usable countertop space, protecting appliances from damage, and providing easy access to frequently used appliances. By carefully selecting the right location, materials, and design, and following a step-by-step guide, you can create a functional and visually appealing appliance garage that suits your specific needs. Remember to optimize storage space, prioritize safety considerations, and incorporate style and aesthetics to enhance the overall look and feel of your kitchen. Regular maintenance and cleaning will ensure that your appliance garage remains in top condition, while the addition of personal touches and customization will make it uniquely yours. With the range of inspiring examples available, you can find the perfect design for your DIY appliance garage and transform your kitchen into a more organized and enjoyable space.