Contents
Are you an avid kayaker who wants to make it easier to access the water? Look no further! This article will guide you step by step on how to build your very own kayak ramp. Whether you’re a beginner or an experienced DIY-er, we’ve got you covered. Building a kayak ramp is a straightforward and cost-effective solution to enhance your kayaking experience. Ready to get started? Let’s dive in!
Choosing the Location
Assessing the Water Access
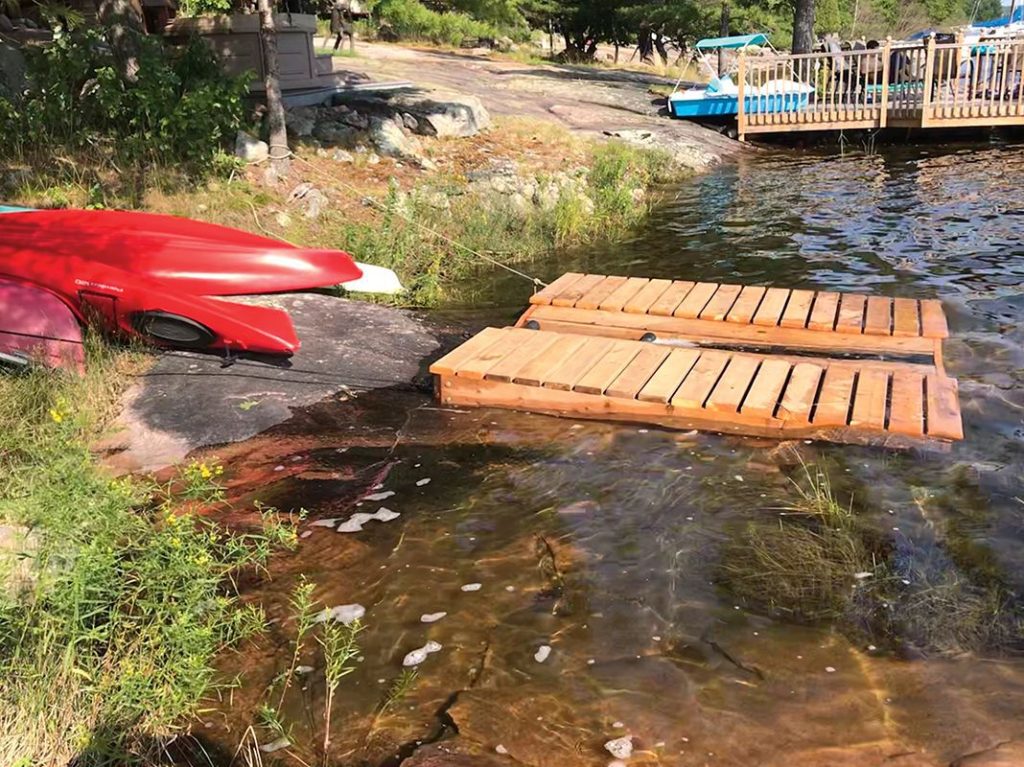
When choosing the location for your kayak ramp, it is important to assess the water access in that area. Consider factors such as the proximity to the water source, the depth of the water, and the ease of entering and exiting the water. Look for an area that provides a smooth and gradual slope, as this will make it easier to launch and dock your kayak.
Considering the Environmental Impact
Before constructing your kayak ramp, take a moment to consider the environmental impact it may have. Do some research on the local regulations and permits required for building structures near bodies of water. Additionally, choose a location that minimizes disturbance to natural habitats and avoids sensitive areas such as marshes or protected species habitats.
Evaluating Safety Factors
Safety should always be a top priority when choosing the location for your kayak ramp. Assess the potential hazards in the area, such as strong currents, submerged rocks, or high boat traffic. Make sure the chosen location provides sufficient space for maneuvering and doesn’t pose any risks to yourself or others using the ramp. It’s also wise to consult with local authorities or experienced kayakers to gather insights on any specific safety concerns in the area.
Designing the Ramp
Determining the Ramp Type
When designing your kayak ramp, you need to determine the type of ramp that best suits your needs. There are various types to choose from, including fixed ramps, floating ramps, and adjustable ramps. Consider factors such as the water levels in your area, the frequency of use, and your own preferences. Each type of ramp has its own advantages and considerations, so take the time to research and select the one that meets your specific requirements.
Considering the Materials
Choosing the right materials for your kayak ramp is crucial for its durability and longevity. Consider using materials that are resistant to water damage, such as pressure-treated wood or marine-grade aluminum. These materials are not only sturdy but also highly resistant to rot, corrosion, and other environmental factors. Additionally, consider the maintenance requirements for each material and choose one that fits your abilities and schedule.
Calculating the Dimensions
Properly calculating the dimensions of your kayak ramp is essential for its functionality and safety. Determine the desired width and length of the ramp based on the size of your kayak and your personal preference. A wider ramp provides stability and ease of movement, while a longer ramp allows for a smoother transition into the water. Take precise measurements and consult with experts or online resources to ensure you get the dimensions just right.
Gathering the Tools and Materials
Basic Tools Needed
To build your kayak ramp, you will need some basic tools, including a shovel, a level, a measuring tape, a circular saw or jigsaw, a drill, and a set of screwdrivers. These tools will allow you to perform the necessary tasks such as digging the trenches, cutting the materials to size, and assembling the various components. Make sure to have these tools readily available before you start the construction process.
Required Materials
In addition to the basic tools, you will need certain materials to construct your kayak ramp. These may include pressure-treated wood or marine-grade aluminum for the framing, decking material such as plywood or composite boards, sturdy posts for support, screws or nails for fastening, and concrete or gravel for the foundation. It is important to gather all the necessary materials in advance to ensure a smooth and uninterrupted building process.
Additional Accessories
Consider including some additional accessories to enhance the functionality and convenience of your kayak ramp. These may include non-slip grip pads or tread covers for the decking to provide better traction when wet, handrails for added safety and ease of use, and storage options such as hooks or racks to keep your kayak and gear organized. These accessories can greatly enhance your ramp’s usability and make your kayaking experience more enjoyable.
Preparing the Site
Clearing Vegetation and Debris
Before beginning the construction of your kayak ramp, clear the site of any vegetation or debris that may obstruct the area. Remove rocks, branches, or any other potential obstacles that could interfere with the stability and functionality of the ramp. This will ensure a clean and safe environment for constructing your ramp.
Leveling the Ground
To create a stable foundation for your kayak ramp, it is important to level the ground. Use a shovel or a rake to remove any uneven or raised areas. Take care to ensure that the ground is level and compact before proceeding to the next step. This will prevent any unevenness or instability in the ramp structure and provide a solid base for the construction.
Marking the Ramp Dimensions
After clearing and leveling the ground, mark the ramp dimensions on the site. Use stakes or markers to indicate the desired width and length of the ramp. This will serve as a guide during the construction process and help you maintain accuracy and consistency in the design. Double-check the measurements and make any necessary adjustments before proceeding with the construction.
Building the Foundation
Digging Trenches for Support
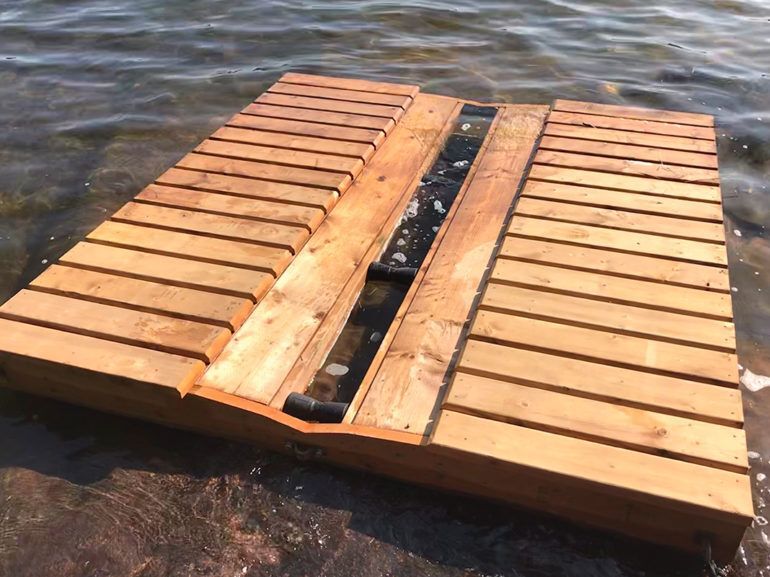
With the site prepared and marked, it’s time to dig trenches for the support beams of your kayak ramp. The depth and width of the trenches will depend on the size of your ramp and the recommended specifications for the chosen materials. Dig the trenches deep enough to ensure structural stability, at least 1/3 of the height of the support posts. Take care to make the trenches level and straight for optimal support.
Installing Support Beams
Once the trenches are dug, it’s time to install the support beams. Place the beams in the trenches, ensuring they are level and aligned according to the marked dimensions. Use a level to check for accuracy and adjust as needed. Secure the beams in place using concrete or gravel, making sure they are stable and firmly anchored. This step forms the foundation of your kayak ramp, so attention to detail is essential.
Filling with Gravel or Concrete
To reinforce the stability of your kayak ramp’s foundation, fill the trenches with gravel or concrete. This will provide additional strength and support to the support beams, ensuring the ramp can withstand the weight and movement of you and your kayak. Follow the manufacturer’s instructions for mixing and pouring concrete, or use gravel to fill the trenches if you prefer a less permanent option. Allow sufficient time for the concrete to cure and dry before proceeding further.
Constructing the Ramp Frame
Building the Uprights and Crossbeams
Constructing the ramp frame involves building the uprights and crossbeams that will hold the decking in place. Use pressure-treated wood or marine-grade aluminum for maximum durability and longevity. Cut the materials according to the marked dimensions, ensuring precision and accuracy. Secure the uprights to the support beams and attach the crossbeams as per the design. Take care to maintain the squareness and alignment of the frame for optimal structural integrity.
Attaching the Decking
Once the frame is constructed, it’s time to attach the decking material. Whether using plywood or composite boards, cut the decking to size and securely fasten it to the frame. Ensure that the decking is level and flush with the frame, allowing for smooth and seamless movement of your kayak. Take additional precautions, such as using stainless steel screws, to prevent rust or corrosion and prolong the life of your ramp.
Stabilizing the Frame
To ensure the stability and longevity of your kayak ramp, it is important to stabilize the frame. This can be achieved by adding diagonal braces or corner brackets for reinforcement. These additional supports will prevent any flexing or wobbling of the ramp structure, providing a solid and secure platform for your kayak. Install the braces or brackets according to the manufacturer’s instructions, making sure they are securely fastened to the frame.
Installing Handrails and Supports
Determining the Height and Style of Handrails
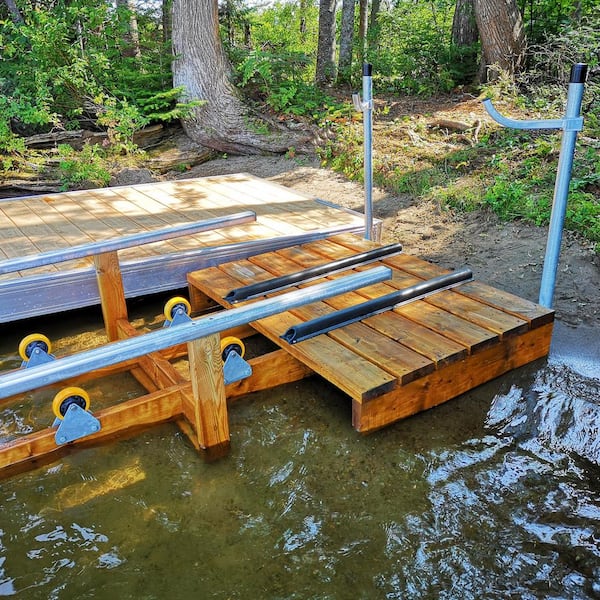
Handrails are an important safety feature of a kayak ramp, providing stability and support during the launching and docking process. Determine the appropriate height and style of handrails based on your personal preferences and needs. Consider the potential users of the ramp, ensuring the handrails are accessible and comfortable for individuals of all ages and abilities. Baluster-style handrails are a popular choice, but feel free to explore different designs to find the one that suits your aesthetic and practical requirements.
Attaching the Handrails
Once the design and height of the handrails are determined, it’s time to attach them to the kayak ramp. Use sturdy materials, such as pressure-treated wood or aluminum, for optimal strength and durability. Ensure the handrails are securely fastened to the decking and frame, using screws or nails that are appropriate for the chosen materials. Take care to align the handrails properly and maintain consistency throughout the ramp.
Adding Additional Supports
In addition to handrails, consider adding additional supports to enhance the stability and safety of your kayak ramp. These supports can be in the form of vertical posts attached to the frame or crossbeams. They provide additional reinforcement and prevent any wobbling or shaking of the ramp structure. Place the supports strategically to ensure they do not obstruct the movement of the kayak or interfere with the handrails.
Applying Finishing Touches
Sanding and Smoothing the Wood
Before applying any protective coating to the wood, it is important to sand and smooth the surface. Use sandpaper or a power sander to remove any rough edges or imperfections. This step will not only improve the appearance of the ramp but also prevent any splinters or injuries during use. Take your time to sand all visible surfaces, paying attention to corners and edges for a polished and professional finish.
Applying Protective Coating
Protecting your kayak ramp from the elements is essential for its longevity and durability. Applying a protective coating, such as a waterproof sealant or marine-grade paint, will help shield the wood from moisture, UV rays, and other environmental factors. Choose a coating that is specifically designed for outdoor use and follow the manufacturer’s instructions for application. Apply multiple coats if necessary to ensure thorough coverage and maximum protection.
Adding Non-Slip Surface
To further enhance the safety of your kayak ramp, consider adding a non-slip surface to the decking. This is particularly important when the ramp is wet or during adverse weather conditions. Non-slip grip pads or tread covers can be applied to the decking, providing better traction and reducing the risk of slips or falls. Choose a product that is durable and suitable for outdoor use, and follow the installation instructions carefully to ensure a secure and effective non-slip surface.
Testing and Adjusting
Verifying Stability and Durability
Once your kayak ramp is complete, it is important to thoroughly test its stability and durability before actual use. Walk along the ramp, simulating the entry and exit with a kayak, to ensure it feels sturdy and secure. Take note of any areas that may require additional reinforcement or adjustment. Apply weight to different parts of the ramp to verify its load-bearing capacity and overall strength. Only proceed to actual use once you are confident in the stability and durability of the ramp.
Modifying for Accessibility
When testing your kayak ramp, consider how accessible it is for individuals with different abilities. If necessary, make modifications to accommodate individuals who may require additional mobility aids or assistance. This may involve adjusting the width or height of the ramp, adding more handrails, or incorporating ramps or graded pathways on either end of the ramp. Accessibility is important to ensure that everyone can enjoy the benefits of kayaking and outdoor activities.
Making Necessary Adjustments
During the testing phase, you may identify areas that require adjustments or improvements. Whether it’s a minor alignment issue or a major structural concern, it is important to address these issues promptly. This may involve making additional cuts, adding support beams, or reinforcing certain parts of the ramp. Take the time to make the necessary adjustments to ensure the ramp is safe, functional, and meets your specific needs.
Maintaining the Kayak Ramp
Regular Cleaning and Inspections
To keep your kayak ramp in optimal condition, it is important to perform regular cleaning and inspections. Remove any debris, leaves, or dirt from the surface of the ramp to prevent water pooling and potential damage. Check the handrails, supports, and fasteners to ensure they are secure and in good condition. If you notice any signs of wear or damage, such as rotting wood or loose screws, address them immediately to prevent further deterioration.
Repairing Damages
Over time, your kayak ramp may experience wear and tear or sustain damage due to various factors. It is essential to address these damages promptly to prevent further deterioration and ensure the safety of users. Repair any cracks or splits in the wood, replace any corroded or damaged fasteners, and reinforce any weak or unstable components. Regular maintenance and timely repairs will extend the lifespan of your kayak ramp and allow you to enjoy many years of safe and enjoyable kayaking experiences.
Updating and Upgrading
As your kayaking needs evolve or new technologies and materials become available, you may consider updating or upgrading your kayak ramp. This could involve replacing the decking with a more durable material, adding additional accessories for enhanced functionality, or implementing new safety features. Stay informed about the latest trends and innovations in kayak ramp construction and make updates or upgrades as necessary to keep your ramp up-to-date and in line with your evolving needs.
Building a kayak ramp can be a rewarding project that enhances your overall kayaking experience. By carefully choosing the location, designing a functional ramp, gathering the necessary tools and materials, preparing the site, building a sturdy foundation, constructing the ramp frame, installing handrails and supports, applying finishing touches, testing and adjusting, and maintaining the ramp, you can create a safe and convenient entry and exit point for your kayaking adventures. So, roll up your sleeves, grab your tools, and get ready to enjoy the ease and accessibility of your very own kayak ramp!

